
Third Party Cookie elimination in common browsersSimon Signal has not and will not be impacted by the elimination of third party cookies by Chrome, Safari or others that follow suit. We only place a first-party cookie.
Introduction
This guide explains how to quickly install the Simon Data JavaScript SDK ("Simon Signal") on your website using Google Tag Manager. The guide includes the following information:
- Requirements for Installation
- Installation Steps
- Troubleshooting Guidance
Requirements for installation
Installation requires a user to have:
- The permissions to add tags using Google Tag Manager
- Working knowledge of HTML and JavaScript
Installation steps
- Install the tracking code in Google Tag Manager (GTM).
- Set up identity tracking
- Set up event tracking
- Preview and verify tracking is working
- Publish the SDK to your site
- Confirm tracking works in a live environment
GTM simplifies the process for integrating the tracking on a site. Specific events and parameters are detailed here.
Step 1: Install the tracking code in Google Tag Manager (GTM)
a) To setup the tracking code in Google Tag Manager, login to GTM and from the Overview page, select 'Add a new tag'.

b) Set the name of the Tag to be "Simon Data - Primary Tag"
c) Click on the Tag Configuration and select a tag type of Custom HTML.

d) Copy and paste the following code into the HTML field. Be sure to replace YOUR_PARTNER_ID_HERE, YOUR_DOMAIN_HERE, YOUR_ENVIRONMENT_HERE, and LOCATION_OF_SIMON_JS with the values provided to you for your site. To see these values, from Simon expand Admin Center then click Signal Installation:
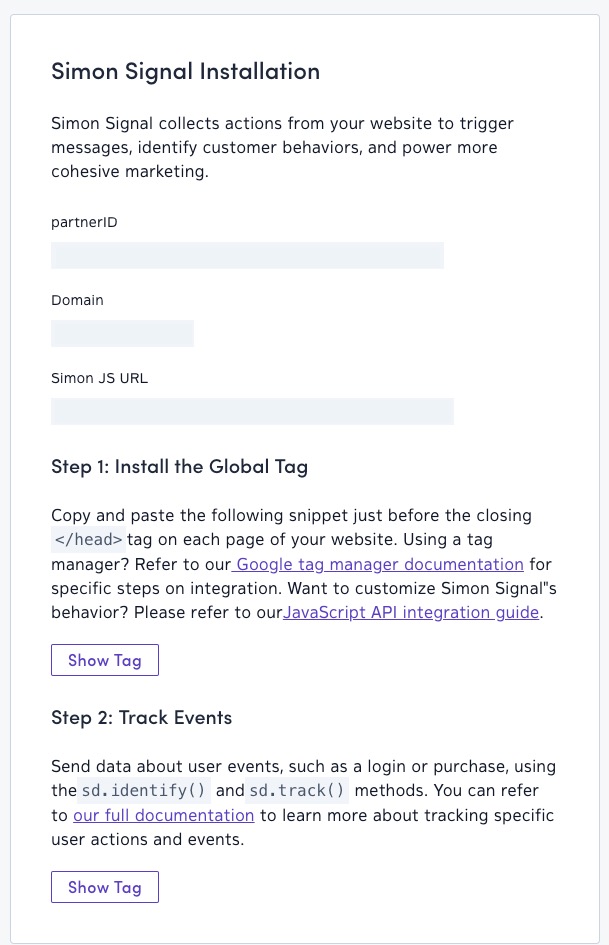
(Note: You can also customize the behavior of your simon.js library. Please refer to the JavaScript API integration guide for details.)
<script type="text/javascript">
    var _sd = _sd || {};
    _sd.partnerId = 'YOUR_PARTNER_ID_HERE';
    _sd.domain = 'YOUR_DOMAIN_HERE';
    _sd.environment = 'YOUR_ENVIRONMENT_HERE';
    (function(s,i,m){
      w=window;d=document;n='script';l=Array.prototype.slice;
      w._sd.lib=i;w.SimonData=s;
      w[s]||(w[s]={
        send:function(){(w[s].q=w[s].q||[]).push(arguments)},
   identify:function(){a=l.call(arguments);a.unshift('identify');w[s].send.apply(null,a)},
        track:function(){a=l.call(arguments);a.unshift('track');w[s].send.apply(null,a)}
      });
      t=d.createElement(n);t.src=i;
      o=d.getElementsByTagName(m)[0];o.parentNode.insertBefore(t,o)
    })('sd','LOCATION_OF_SIMON_JS','script');
</script>
e) In the Triggering section, select the trigger that will load on each page of the site that you want to track activity from. If you do not have an All Pages trigger, then create a new Trigger named "All Pages" with Trigger Type of "Page View" that fires on All Page Views.

The primary tag is now setup to be injected onto all of the pages. Next, we will need to set up event tracking.
Simon Data uses two tags to capture events: track and identify. The call to identify should be called when web activity can be associated with an email address, such as when a user logs into his or her account. track is used for any event that is not identify.
Step 2: Set up identity tracking
Simon Data uses the identify function when user activity can be associated with an email address, such as when a user logs into his or her account.
An identify call has the following format:
sd.identify(userId, [traitsObject]);
If you have already enabled a Trigger for a login event and Variables for a user ID, username and/or email address, then go to step (3a). Otherwise, we recommend adding Triggers and Variables to your site as outlined by Google in the Tag Manager Help Documentation.
a) Create a New Tag in GTM and name it "Simon Identify". Select a tag type of Custom HTML Tag.
As you create identify / tracking calls, ensure that Tag Sequencing (Under Advanced Settings) is configured to have Simon Data - Primary Tag triggered before the identify/tracking call fires.
b) Add the sd.identify(...) tag, including the necessary Variable names. You can pass data from GTM Variables into the appropriate fields of a Tag with {{variable_name}}. Be sure to replacevariable_name with the name of the Variable you used in GTM. An identify tag with GTM variables might look like this:
<script type="text/javascript">
sd.identify('{USER_ID}', {
  name: '{USERNAME}',
  email: '{{email_address}}'
});
</script>
Please note that the userId and email are both required for the identify call. userId does not require a specific format, but should correspond to a unique user account for your site (e.g. username, account id, or email address, depending on how your accounts are structured). If the userId is also an email address, then populate both the userId field and email field with an email address.
For example, an identify tag populated with data from Variables would appear similar to the one below.
<script type="text/javascript">
sd.identify('test123', {
  email: '[email protected]',
  name: 'testname'
});
</script>
c) Select the Trigger that will fire the tag. For an identify event, the Trigger might be a successful login event.
Next-Gen Identity Identifier RequirementsIf your organization is on Next-Gen Identity, email address is no longer required. However, you must ensure that the identifier values present on your Simon Signal events match the identifiers present in your organization's Simon account.
For example: if your account utilizes the User ID identifier and you want to include userId on your Simon Signal events, you must pass us the actual User ID values in the userId field in Signal events and not the values of another identifier.
If there is a non-userId field you want to include in your Signal events, we recommend putting that value in the 'properties' object.
Step 3: Set up event tracking
The track function is used for any event that is not identify. The SDK tracks page load events automatically. Additionally, specific events that occur on a page or by visiting a page can be tagged. This may include common events such as
page_viewcomplete_transactionproduct_viewadd_to_cartupdate_cartremove_from_cart
To set up event tracking:
a) For each event to be tagged, create a New Tag in GTM and name it after the event. Select a tag type of Custom HTML Tag.

b) Add the sd.track(...) call that corresponds to the event you wish to track, including the necessary Variable names. You can pass data from GTM Variables into the appropriate fields of a Tag with {{variable_name}}. Be sure to replacevariable_name with the name of the Variable you used in GTM. A track tag has the following format:
sd.track(eventType, [eventObject]);
The eventObject varies based on the eventType (see Event Details and Descriptions for a reference of events and their associated variables). A track tag for a product_view with GTM variables might look like this:
<script type="text/javascript">
  sd.track('product_view', {
  productId: '{{product_id}}',
  brand: '{{brand}}',
  category: '{{category}}',
  productName: '{{product_name}}',
  price: {{price}}
  });
</script>
c) Select the Trigger that will fire the tag. For a product_view event, the Trigger might be that a user loads a product details page.
d) Repeat for other Events such as complete_transaction and add_to_cart.
For more information about supported events and examples, including required and optional parameters, view the Event Details and Descriptions.
Step 4: Preview and verify tracking is working
Google Tag Manager allows you to preview a set of changes in your local browser before publishing them to a live site.
a) Enable Preview mode by selecting Preview from the Publish drop-down menu in the upper right corner.

b) Verify that the SDK is installed and setup correctly with the following steps:
- Open your website in a new browser tab.
- Open the browser’s developer tools / inspector window.
- Select the tab that displays network requests and select "All" requests to be shown.
- Filter the requests in the search field by "simon".
- Press the reload button.
- Verify that requests to that domain are succeeding (response is HTTP 200).
- Verify that the correct parameters and variables are being sent in the request.
Step 5: Publish the SDK to your site
Once you have completed the installation and testing process in Preview mode, publish the SDK to your live site by selecting Publish in GTM. Repeat step 4b to verify the tags work in production.
Troubleshooting
If you run into any difficulties or have any questions please contact us for additional assistance.