Contact Data Datasets
Some considerations before you create a dataset
- Each dataset is associated with a unique set of fields, and no two datasets can be associated with a field with the same name.
- You can't delete a field after you commit your dataset. Your Account Manager must do this. Be sure to pre-plan your dataset before hitting commit.
- If you want to work directly from a .csv upload, see Lists.
Step one: choose your dataset details
- From the left navigation, click datasets.
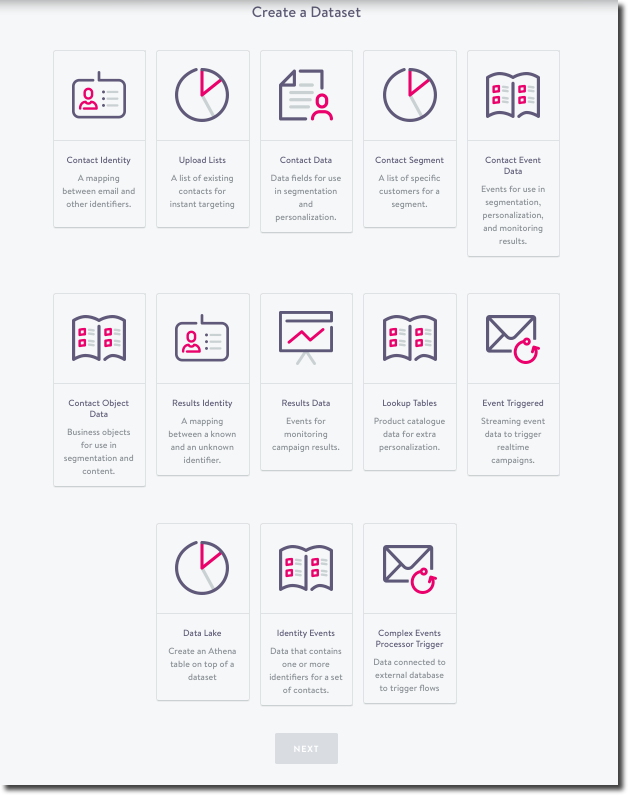
- Click Create Dataset. The dataset types appear:

Create a Dataset options
- Choose a dataset type then click next. Depending on your choice, you're presented with a few more details:

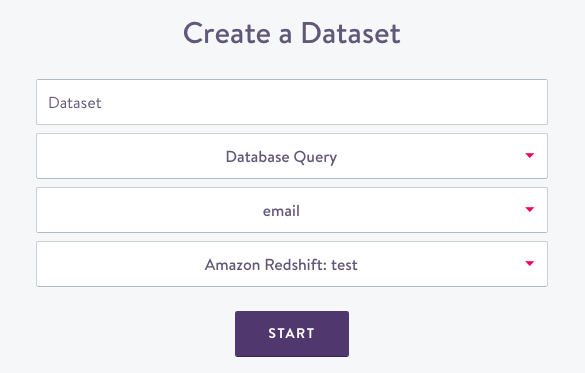
Dataset source
- Name your dataset; choose something new and unique for future organization.
- Pick a source, either a SQL query you'll write that Simon will run against your database or a .csv upload.
- Pick the one identifier you will use in your dataset. If you're using more than one identifier in an upcoming segment, you need to create mutiple identity datasets then use all of them in your segment.
- Click Start.

- Under Database Schema, choose a database that contains your fields.
- Next, you need to either write the SQL query that Simon will run against your database or upload a file, depending on what you selected in step 5.
Option one: choose fields via SQL Query
- Write the SQL that Simon will run against your database:

SQL query
- Editor: write the SQL that Simon will run against your database
- Fields: See Configure Fields
- Versions: View all versions of this query including author and creation date and time
- Executions: View all run details (date, time, execution length, rows returned)
Option two: choose fields via .csv
- Click Choose CSV then navigate to your file, highlight, and click Upload.
- If your CSV contains headers, check CSV already contains headers to indicate this. Header names must be unique/distinguishable from any other existing fields across the datasets in your account. For example,
csvname_first_nameinstead offirst_name. - You can also override your existing headers here; click CSV already contains headers so that they are excluded during ingestion and also enter new names under Headers.
- If your file has no headers, manually enter the header names, which will become the field names within Simon. Note that these must be alphanumeric, uncapitalized strings.

Upload
Step two: validate
Click Validate. This will check that the dataset is ingestible by Simon and, if so, return a small sample. Correct any validation errors if necessary (see Dataset Validation).
Step three: configure fields
All fields require a data type for the Simon model. The following types are supported:
- boolean
- currency
- float
- integer
- positive integer
- big integer
- string (< 255 characters)
- text (255 characters)
- date
- rate
- set
When choosing a data type, consider the different operators that you'll need later (e.g. ‘greater than’ for integers, ‘contains’ for strings). In some cases how the field is saved in your database will differ from how it is saved in Simon. For example, while an order ID may be an integer in your database, it may make more sense to save it as a string in Simon since you won't be using any arithmetic operators.
The fields in a Contact Data dataset can be used in segmentation, campaign content, or both. You must specify the purpose of each field.
If the field is to be used for segmentation, select Condition. Condition ensures the field appears for use in the segment builder, and without this button activated the field cannot be used for segmentation. If selected, the field must have a display name for display in the builder. Once used as a condition in segmentation, a field is always a condition. This ensures existing segments that rely on the field are not disrupted.
If the field is to be used as content, select the Content button. Content ensures the field is available for use in Custom context basics during flow creation. No further validations are needed, and, like a condition, a content field stays a content field for its lifetime. In addition, if a field is marked for content it displays on the contact's profile page, under the information tab.
Note on implied null values
In some cases null values are unavoidable. However it is often the case that a null value implies useful information. For example, a contact without any purchases may return null as their total purchased amount, but it can be implied that their total purchased amount is $0. Simon Data supports implied values that have different defaults based on data types:
| Type | Default Implied Value |
|---|---|
| Numeric | 0 |
| Boolean | False |
| String/Text | Null |
These implied values can be overridden on a per-field basis. To do so, please contact your Client Solutions Manager.
Step four: save and commit
If the dataset is valid, click Save to create it. At this point, the dataset will not be ingested by the Simon data pipe, but you may leave the page and come back to continue working on it. The Dataset is now in the develop status (see Dataset Lifecycle).
To make the dataset live and begin ingesting data, click Commit. This will create the new fields and associate them with the dataset.
After this step, the dataset must always contains fields with these names.It now has a status of live and will be picked up by the next run of the Simon pipe.
Step five: extract validation
The settings tab contains dataset-level and field-level validation checks to ensure the dataset can be successfully ingested by Simon for use in your account. Validation failures result in a failed extract that generates an Action Panel item. See Dataset Validation for more details.
Dataset notifications and alerts
You can receive custom notifications and alerts about what your datasets are doing. See Configure Simon notifications and alerts.
Updated 3 months ago
