
Migrate to Simon Data Feeds
BetaThis feature is in Beta. Contact your Account Manager for more details.
What are data feeds?
Data feeds can be attached to each flow execution and designed to capture certain attributes for a given customer receiving that communication at the exact time of send.
For example, you can see attributes like LTV, last purchase amount, etc at send time and use this data to measure how the communication impacted those attributes
To start using self-serve data feeds in Simon Activate, complete these steps:
Step one: prepare your downstream reporting
If you're migrating to self-serve data feed configurations the data used for your reporting may look different than you're used to. To simplify the transition, take a look at your existing reporting and plan to match your fields in setting configurations in step two.
To see what your existing reporting looks like:
- From the Classic Flow Builder, create a new flow.
- Choose a segment then bottom.
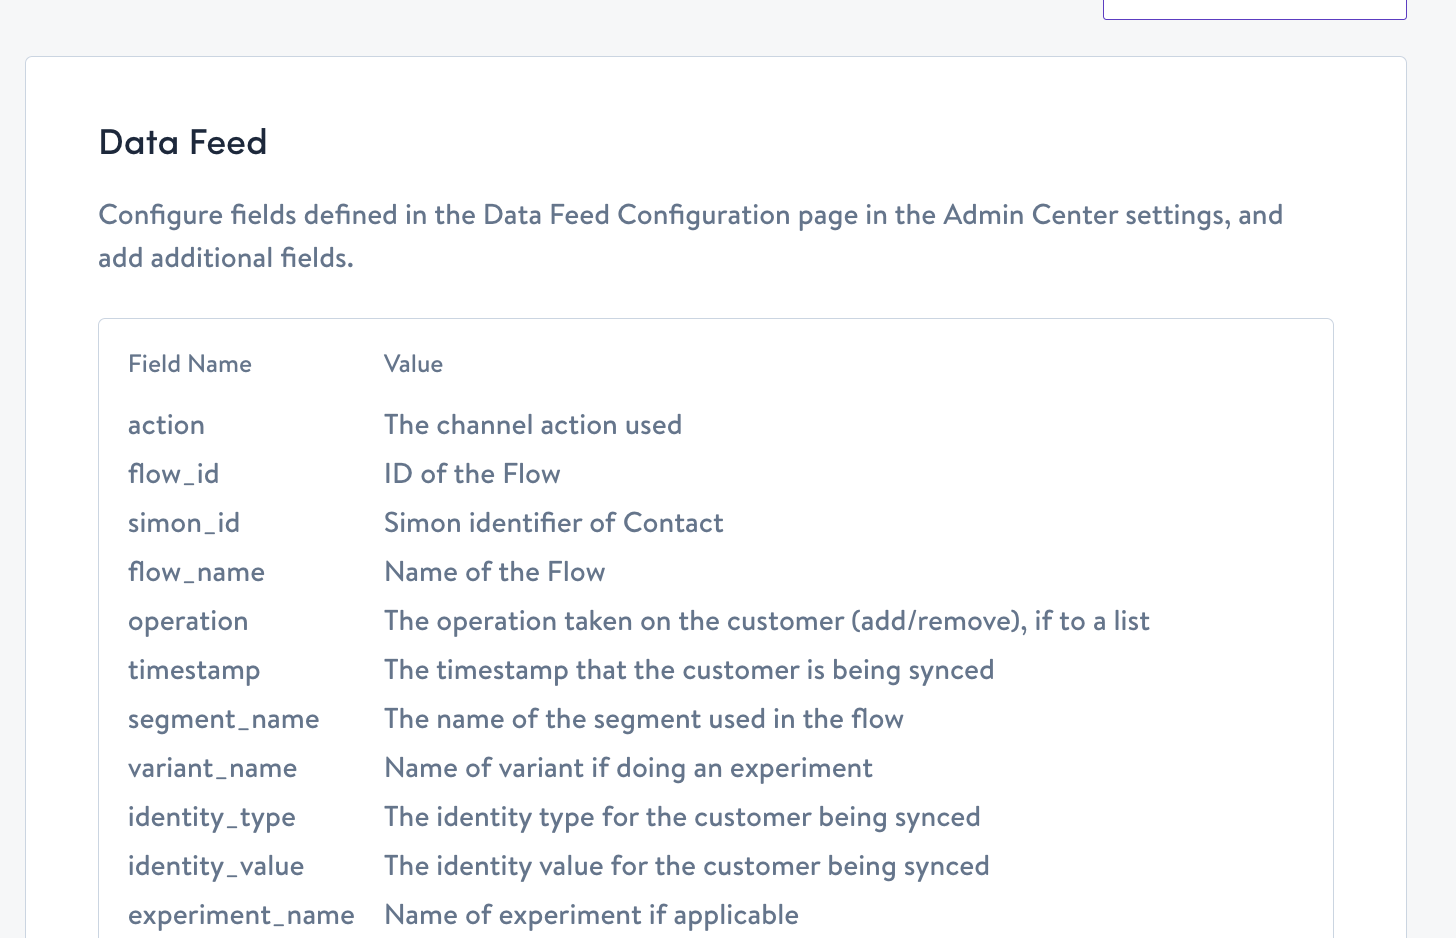
- Take a screenshot of the fields you're using by default today. It will look something like this:

Note the field names and values for as many common fields that you want to apply globally. You'll use this information in step two below.
Step two: set your data feed destination
- From the left navigation, expand Admin Center then click Settings.
- Click Data Feed Configurations.
- Check the box to Enable Data Feed. (If this is disabled then any live flows with data feeds will not export or write data.)
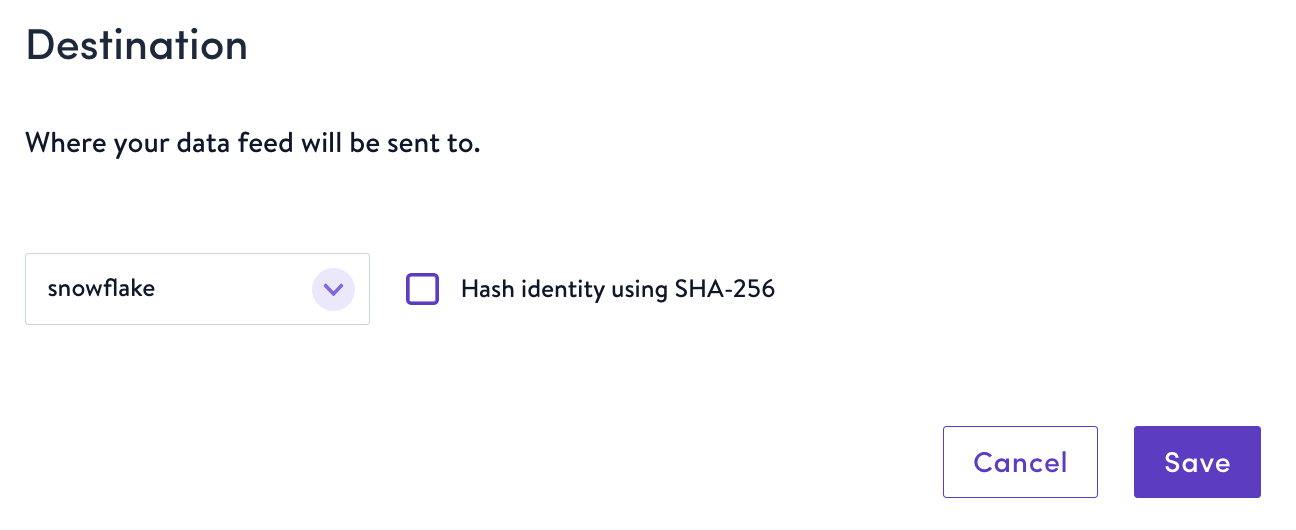
Snowflake
Choose Snowflake, then optionally check the box to Hash identity using SHA-256 to anonymize and deduplicate data. Note, you can only choose to hash identity from this global level, not from the flow level.
S3
Choose S3, then optionally check the box to Hash identity using SHA-256 to anonymize and deduplicate data. Note, you can only choose to hash identity from this global level, not from the flow level.

- File Format: Choose either a CSV or JSONL file to send downstream. If using JSONL, also review Parse and view fields in your downstream reporting below.
- Bucket Name: Options are imported from your Integration settings. To update, from the left navigation expand Admin Center then click Integrations.
- Path (Optional): Include your preferred file path.
Best practice is to use the settings you're using currently and replicate those settings when configuring your data feeds here.
SFTP
Choose SFTP, then optionally check the box to Hash identity using SHA-256 to anonymize and deduplicate data. Note, you can only choose to hash identity from this global level, not from the flow level.
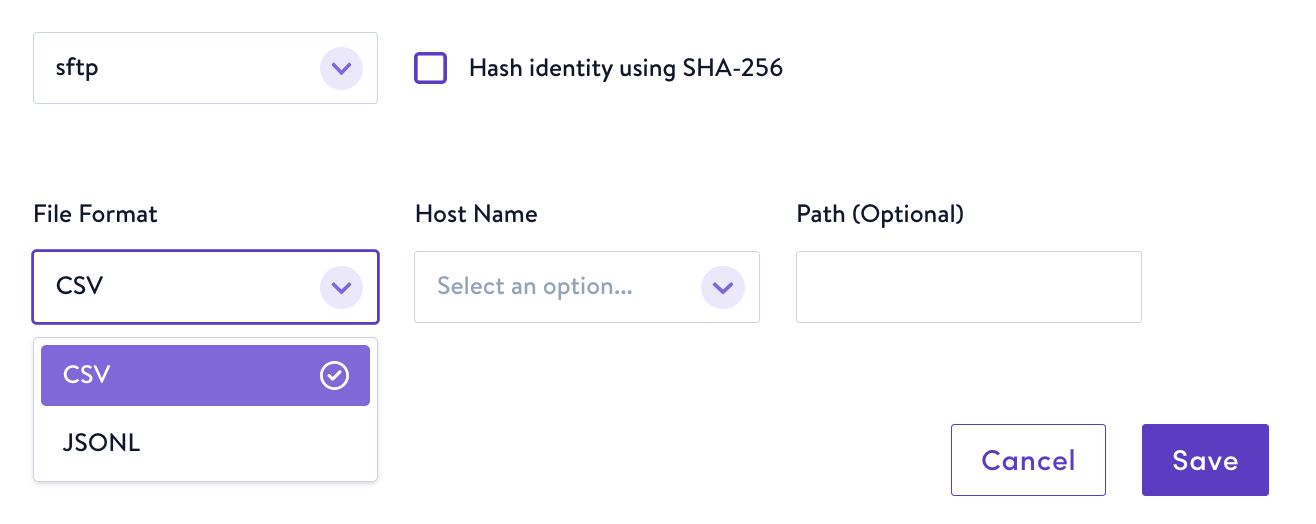
- File Format: Choose either a CSV or JSONL file to send downstream. If using JSONL, also review Parse and view fields in your downstream reporting below.
- Host Name: Options are imported from your Integration settings. To update, from the left navigation expand Admin Center then click Integrations.
- Path (Optional): Include your preferred file path.
Best practice is to use the settings you're using currently and replicate those settings when configuring your data feeds here.
Click Save to save your fields and destination settings.
Step three: configure fields
Configure fields that will be a part of your data feed for every flow. This is where you'll make choices about what fields you want to see in every report you have downstream and even what value choices you want to allow for each field.
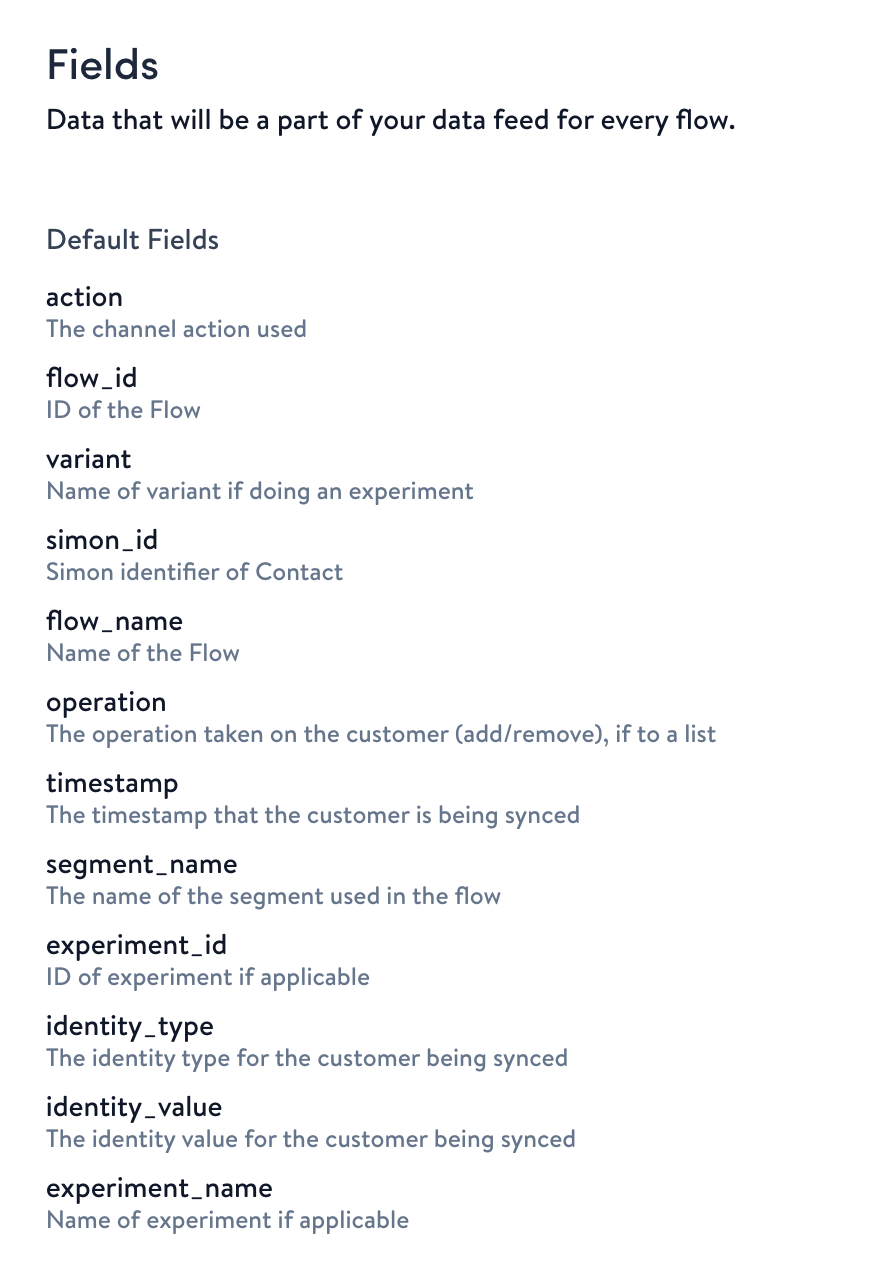
Default fields
- Under Fields, there are multiple default fields that can't be edited. Some commonly default fields are
simon_id,flow_id,flow_nameetc.; these fields will always be sent to your reporting destinations downstream. Note that these default fields are consistent with the default fields included in Data Feeds from Simon Classic.
Default data fields, varies by organization
Custom fields
- Add up to 50 custom fields to apply globally. Click Add Field.
- Name your field using only alphanumeric characters or underscores (no spaces), and in lower case. This name will appear on the flow level and can only be changed from the Data Feed Configuration screen. You can continue to add additional custom fields on the flow level that won't be saved globally.
- New to Simon Activate Data Feeds so you can improve on how you collect values, choose a field type:
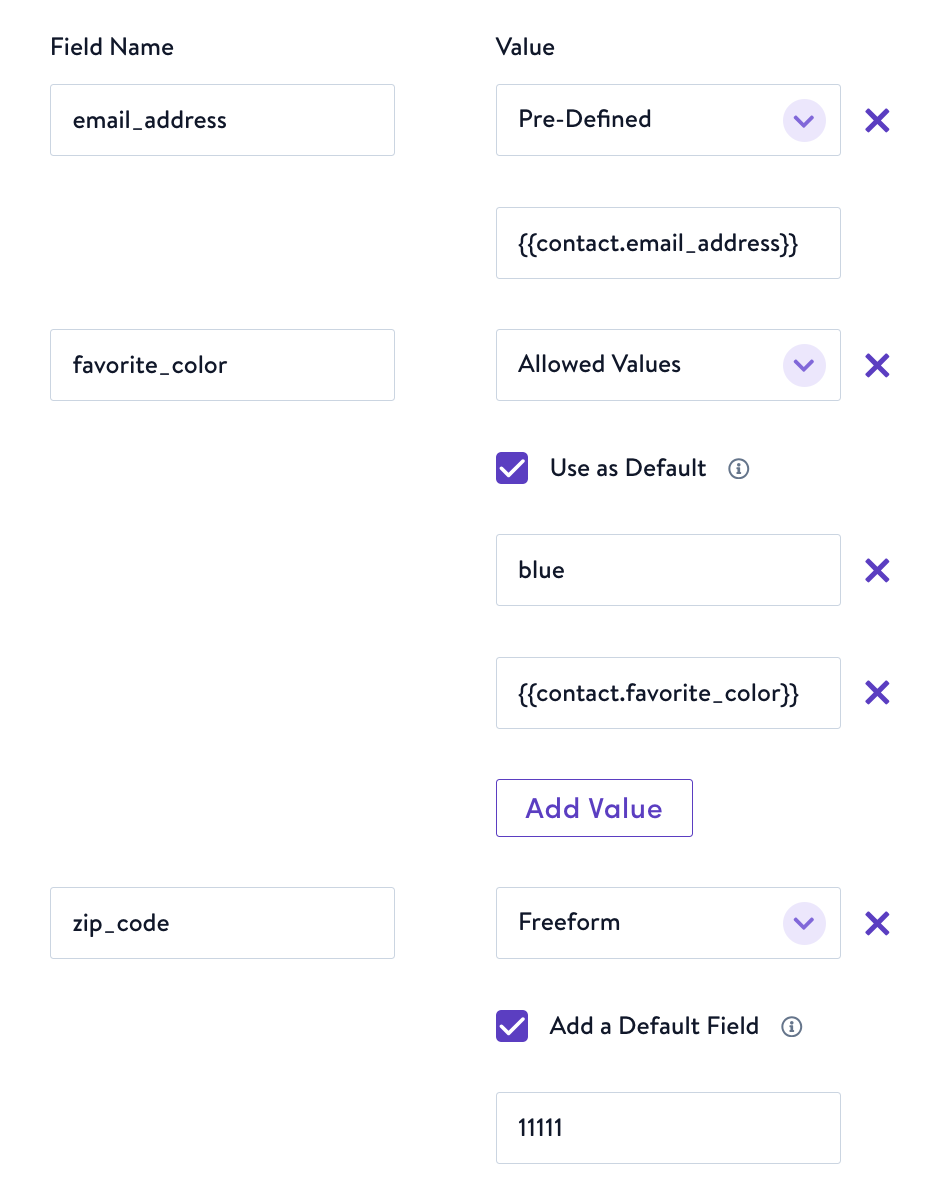
- Pre-Defined: Provide a default value and it won't be overwritten at the flow level
- Allowed Values: Provide values for the user to choose from at the flow level (they'll appear in a drop down in the flow). Optionally, check the box to Add a default field and enter a default value. (At the flow level, you can enter any value and overwrite the default value). Click Add Choice to add as many as you need. Allowed values look like this in a flow:

- Freeform: Optionally, check the box to Add a default field. (At the flow level, you can enter any value and overwrite the default value). Freeform fields look like this in a flow:

- You can use custom context when setting any of the default values (for example
{{contact._favorite_color}}) to use dynamic values Keep in mind that a skip_action called in Data Feeds will not skip the contact in the action of the flow, as the creation of data feeds is independent of the action itself. You can return to these settings and update them at any time.
- If you update a default value and an active flow field uses that default value, it will change to the new default value. For example, if you change from a static field with a default value of "blue" to an allowed values field with a default value of "red," the flow fields will all update to "red."
- If you change the global field type, the active flow field value will change to the default value.
- In general, all live flows get updated when the global settings get updated so that future syncs will reflect the new custom context (but data that has already been written from a sync prior to these changes won't be updated).
Step four: create a test flow
Create and send a new, test Beta Flow to:
- Confirm all custom field configurations from step two appear as expected
- Test you're correctly receiving downstream reporting
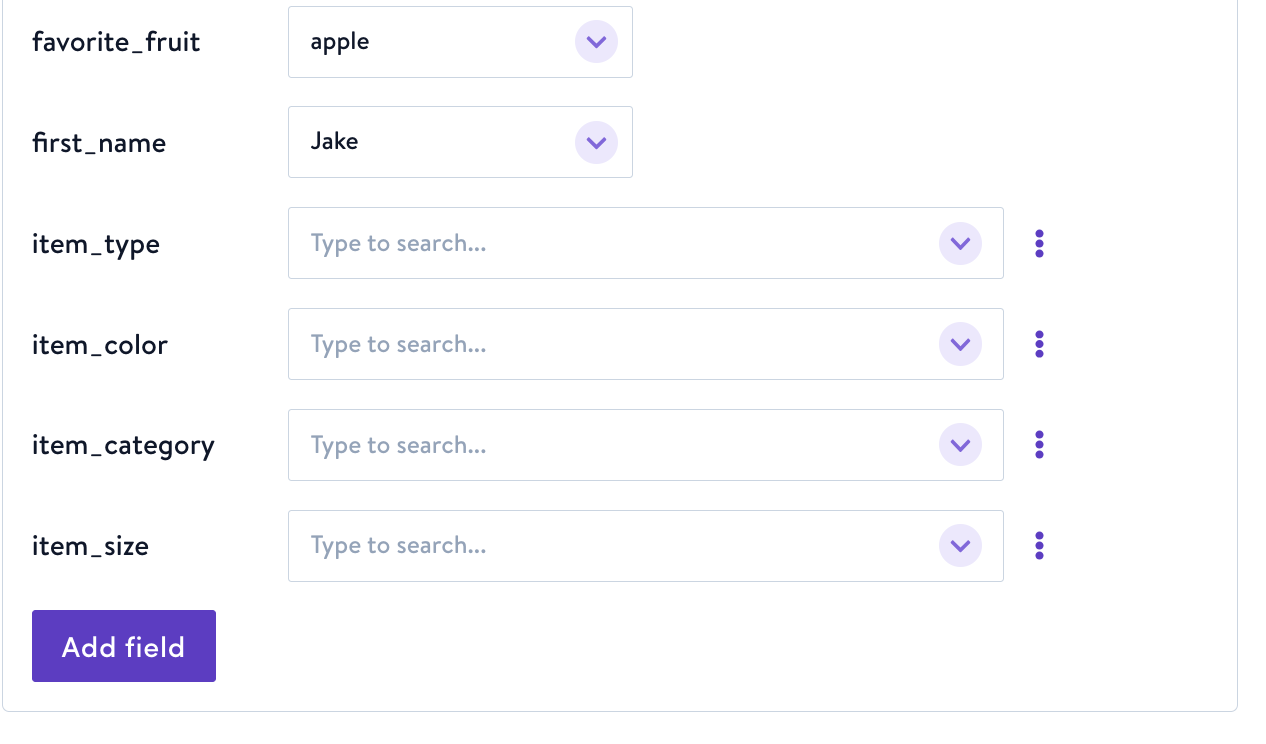
After you create a flow, data feed details display at the bottom of the page. Default fields display lighter and can't be edited from the flow:
The custom fields you set display below the default fields with the settings you chose in Data Feed Configurations:
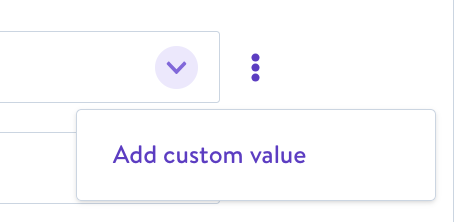
To add a custom value, click the ellipsis next to the field:
You can also click Add field to add custom fields directly from a flow, however these fields will only be sent downstream for the flow you add them in. Including commonly needed fields globally via Data Feed Configurations saves you time!
To edit your custom fields' default values, see Custom Fields above.
Step five: parse and view fields in your downstream reporting
The biggest difference in file format from the Simon Classic Data Feeds you are used to is that your custom fields will appear together in JSON format in a field called ATTRIBUTES. For example:

To update your reporting that is reliant on this data, you will need to update your queries to extract these custom fields from the ATTRIBUTES field.
To extract the JSON in the select statement, create a query like the example below:
SELECT flow_id, flow_name, simon_id, experiment_name, variant_name, segment_name, identity_type,
identity_value, timestamp, action, operation, attributes:favorite_color as favorite_color,
attributes:email as email, attributes:zip_code as zip_code
FROM ACTIVATE_DATA_FEED_CURRENT
Disable data feeds globally
If you have live flows with data feeds, you can disable data feeds globally. Those live flow syncs will no longer write/export data feed information. When you create a new flow with data feed off, then the new flow will not display data feed options. To do so:
- From the left navigation, expand Admin Center then click Settings.
- Click Data Feed Configurations.
- Uncheck the box to Enable Data Feed.
Updated 9 months ago