Use event data from triggers
What is event data?
Event data is available for campaigns that are triggered by an event, such as an abandoned cart. Different events will have different data available. In the case of an abandoned cart, we would have access to information about the items that were in the cart.
The event data consists of clickstream data ingested through Simon Signal. Event data generally follows the schema of the Simon Signal events. You can find out more about the Simon Signal event schema here.
If event data is available for the type of campaign you have selected, the ‘Event’ tab will display in the Custom Context, template, or block editor. A random event will be loaded when you open the editor, or you can enter an identifier to look for specific events.
The syntax for event data follows one of the following formats:
{{ event_raw.<parameterName> }}or
{{ event_raw.<eventObject>.<parameterName> }}Using event data from a Registration event
Simon gives you the option to personalize your welcome message based on the data passed on in the registration event. In this example, we use it to include the first name in the subject line. (Because this event applies specifically to new contacts, there would be no way to grab that data from the contact profile, since there isn’t a profile yet for this new contact).
Welcome, {{ event_raw.properties.firstName }}!After adding default values, it looks like this:
  {%- if event_raw.properties.firstName %} Welcome, {{ event_raw.properties.firstName }}!
  {%- else %} Welcome!
  {%- endif%}
Managing whitespaceJinja exposes controls for how to handle whitespace within your text, by placing a
-at the start or the end of the tag. The above examples, for instance, are removing new lines, but keeping the space between the comma and the name. You can read more within the Jinja documentation.
Using a single product from an abandoned cart
If event data is available for the type of trigger you have selected, the ‘Event’ tab will load in the content editor. Abandoned cart items are stores in an array, and can be accessed in the following way:
{{ event_raw.cartItems[i].<parameterName> }}If I want the productId for the first item in an abandoned cart, I can get it as follows:
{{ event_raw.cartItems[0].productId }}The number 0 after cartItems represents the first item in the array cartItems. As always, I should add default values. In this case, I first check that a specific cart item exists, and then that it has the property that I’m looking to use. This last part is useful because some cart properties are optional:
  {%- if event_raw.cartItems[0] and event_raw.cartItems[0].productId %}
     {{ event_raw.cartItems[0].productId }}
  {%- else %} <Default event value>
  {%- endif %}
It can be safer to not reference specific items in the cart, and instead loop through the cart items. We will show you how to do this a little further down.
Using an event key with lookup tables
If you are new to lookup tables, check out our guide Getting started with Lookup tables. When working with cart data, you may often want to reference a product catalog that is stored in a lookup table. That could look something like this:
{{ lookups.product_catalog[event_raw.cartItems[0].productId].productName }}We can assign the productId to the variable product to make things a little easier to follow:
  {% set product = event_raw.cartItems[0].productId %}
  {{ lookups.product_catalog[product].productName }}
Of course, we want to make sure that we handle default values for event data as well.
  {% set product = event_raw.cartItems[0].productId %}
  {% if lookups.product_catalog[product] and lookups.product_catalog[product].name %}
  {{ lookups.product_catalog[product].name }}
  {% else %} <A default value>
  {% endif %}
Loops
Using loops with Abandoned carts
In some cases, you may want to dynamically create more advanced content, such as an abandoned cart message with all the products that were left in the cart. You can do this by setting up a the personalization with a loop that generates the HTML for every product in the cart. This is useful because when you create a template, you don’t know how many products will be in any given cart.
A loop will look something like this:
  {% for item in event_raw.cartItems %}
     <create HTML for this product…>
  {% endfor %}
We can use the following product-specific information in my example:
- product name:
item.productName - price:
item.price - color:
item.color - image URL:
item.productImageUrl
This syntax works because I’m looping through all the cartItems and I can use the variable item at any point to reference the specific item that my loop is at.
We need to add the HTML code and insert the parameters to retrieve the relevant data for each product in the cart. In the case of the product image, it looks like this:
  <td style="padding: 20px 0;" width="10%">
             <img src="{{ item.productImageUrl }}" alt="" width="95">
  </td>
If all we wanted to do was to display the images for all the products in the cart, including a default image if the URL is missing from the event, we could set up this template:
  {% for item in event_raw.cartItems %}
  <td style="padding: 20px 0;" width="10%">
  <tr style="border-top: 1px solid #e1e1e1; padding-bottom: 30px">
     <img src="{%- if 'productImageUrl' in item %}{{ item.productImageUrl }}
                 {%- else%}<a default image URL>
                 {%- endif %}" alt="" width="95">
  </td>
  </tr>
  {% endfor %}
Here, we added a dash to using the expression {%- to avoid creating a new line within the template.
In our example, we also want to include other product information. We would therefore add the corresponding HTML and event data for price and productName.
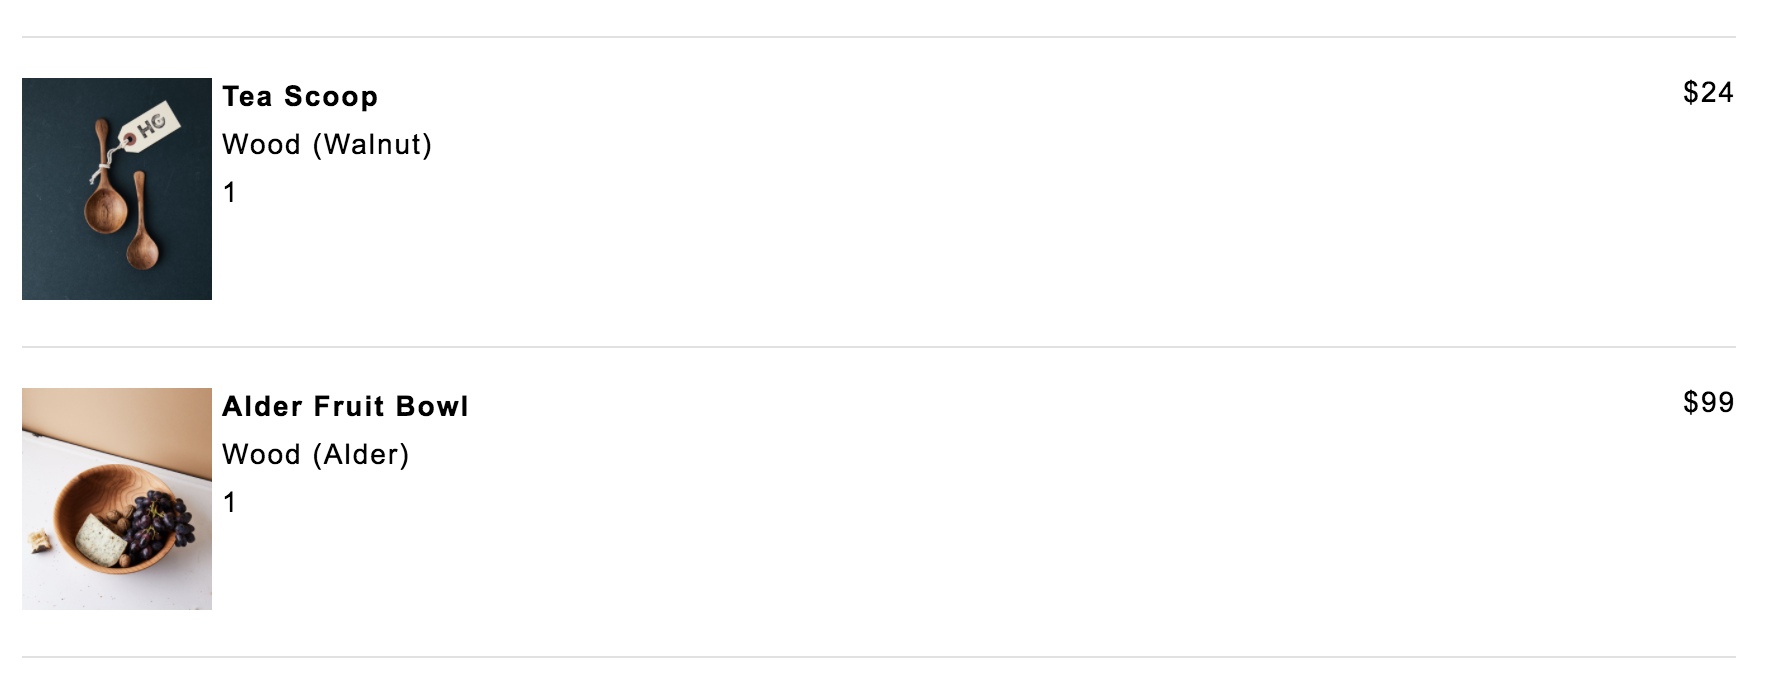
The part of the email containing product information might end up looking something like this:

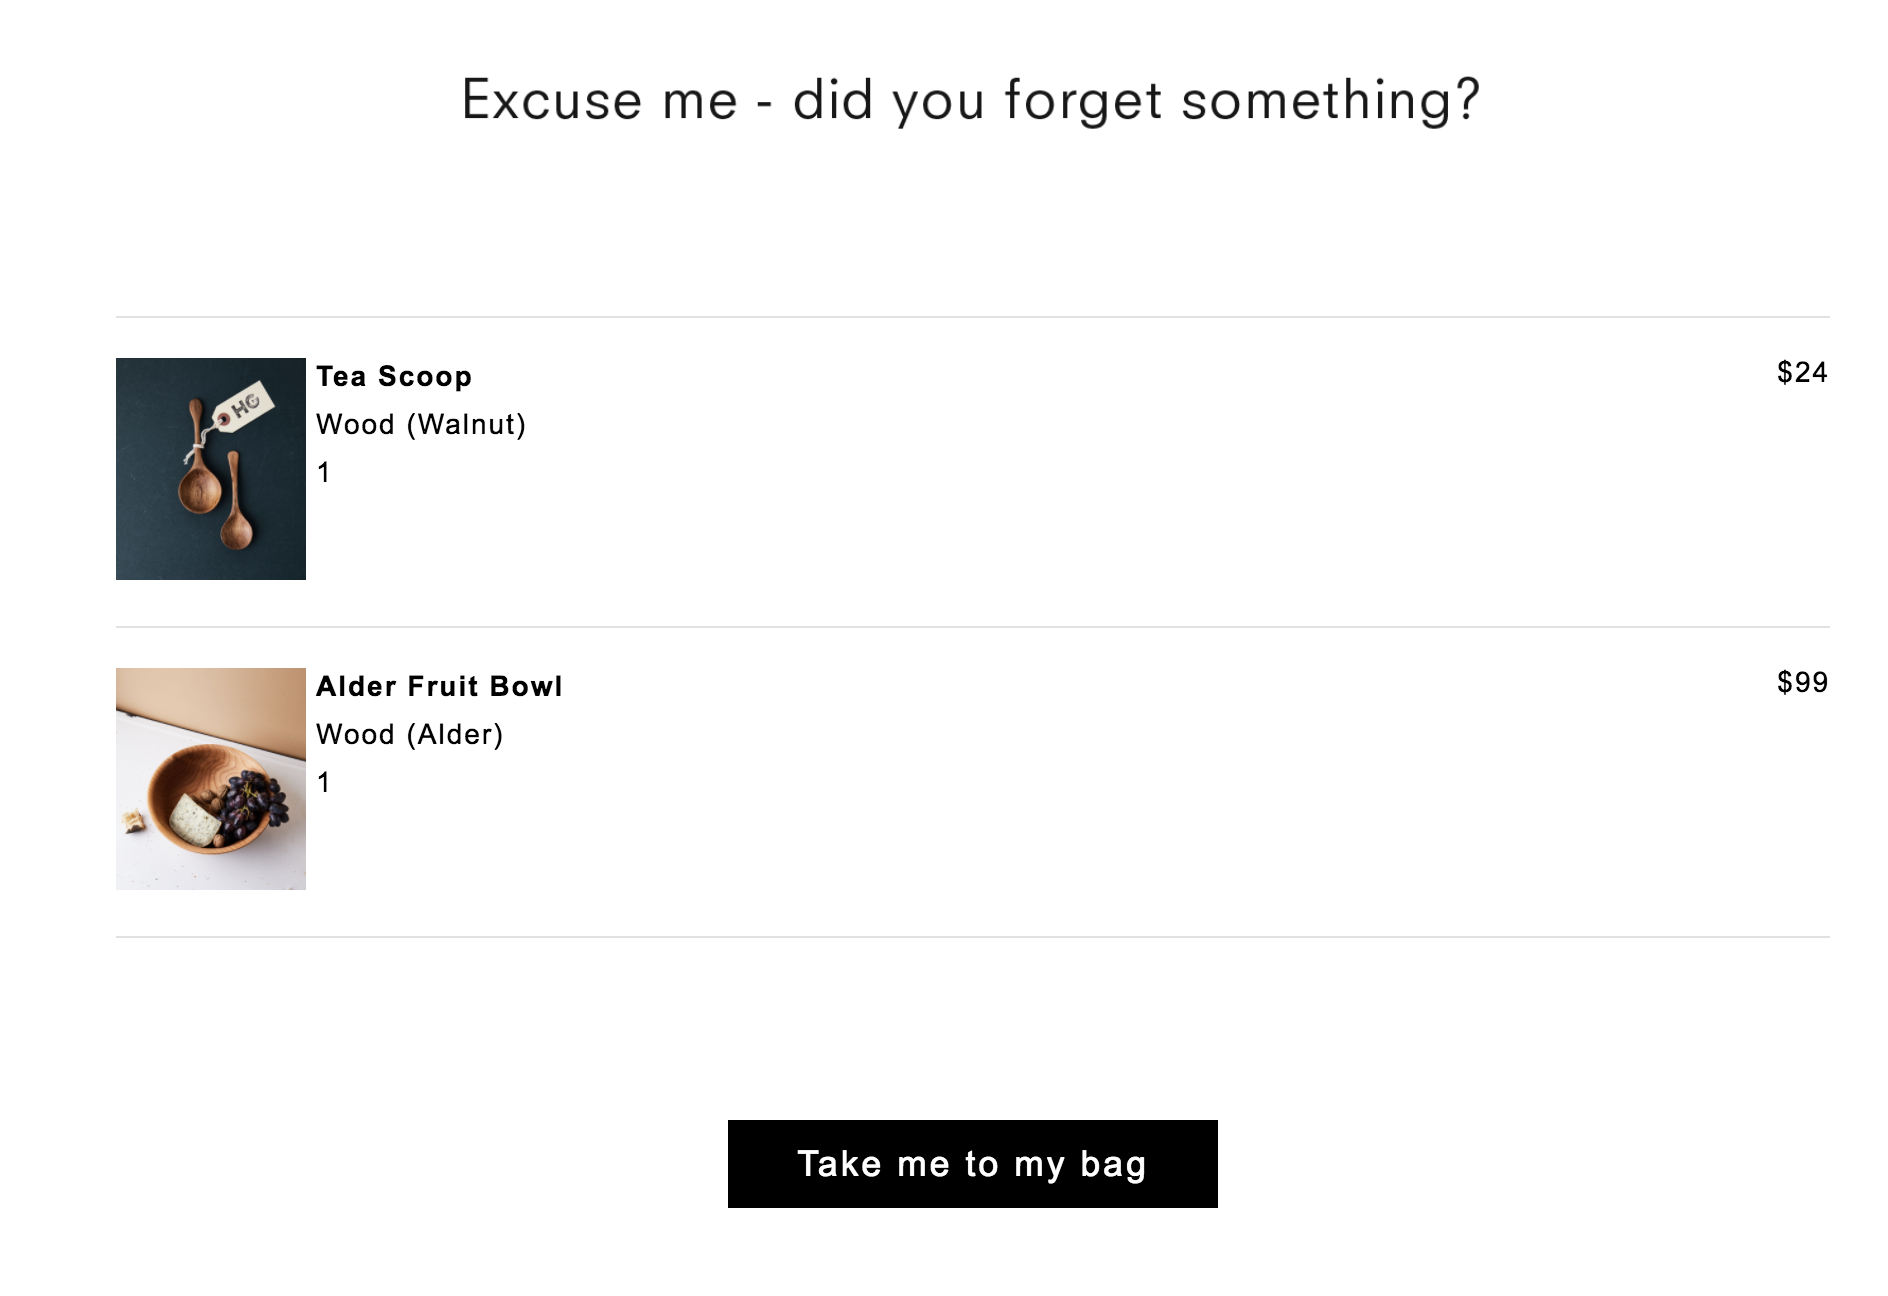
When an abandoned cart comes in, all the product information will be filled in for each product and it can be inserted into the rest of HTML code before it goes out. The final email might look something like this:

Limiting loops
You can easily limit the number of products that you display. Instead of looping through all the items in the cart, we'd only go through the first three. We just modify our initial loop statement.
{% for item in event_raw.cartItems[:3] %}The use of [:3] will limit the loop to the first three items.
Using loops and Lookups
Now that we have learned to work with both loops and lookups, we can combine them in a single abandoned cart message.
  {%- for item in event_raw.cartItems[:3] %}
  {%- set product = item.productId %}
  <td style="padding: 20px 0;" width="10%">
  <tr style="border-top: 1px solid #e1e1e1; padding-bottom: 30px">
     <img src="{%- if  lookups.product_catalog[product] and lookups.product_catalog[product].imageUrl %}
  {{- lookups.product_catalog[product].imageUrl }}
  {%- else %} <A default URL>
  {%- endif %}" alt="" width="95">
  </td>
  </tr>
  {% endfor %}
Using default content
We can code our template to protect against the case where our event data and lookup table gets out of sync, for instance if our product catalog is out of date. The below shows one example of this, where we display a generic message if none of the products can be found:
  {%- set vars = {'products_found': False} %}
  {%- for item in event_raw.cartItems[:3] %}
  {%- set product = item.productId %}
  {%- if lookups.product_catalog[product] %}
     {%- if vars.update({'products_found': True}) %} {% endif %}
     <td style="padding: 20px 0;" width="10%">
     <tr style="border-top: 1px solid #e1e1e1; padding-bottom: 30px">
         <img src="{%- if  lookups.product_catalog[product].imageUrl %}
     {{- lookups.product_catalog[product].imageUrl }}
     {%- else %} <A default URL>
     {%- endif %}" alt="" width="95">
     </td>
     </tr>
  {%- endif %}
  {%- endfor %}
  {%- if not vars.products_found %}
     You left some great products behind!
  {%- endif %}
Updated 3 months ago
