Create results
Simon Results is a powerful analytics product that enables any marketer to understand the impact of lifecycle interventions. With just a few clicks, you can build powerful visualizations and funnels that help provide insight into customer behavior patterns, engagement with marketing campaigns, and downstream retention.
Building a results view
To begin creating a result, click “Create New Result”. You’ll be taken to this screen:
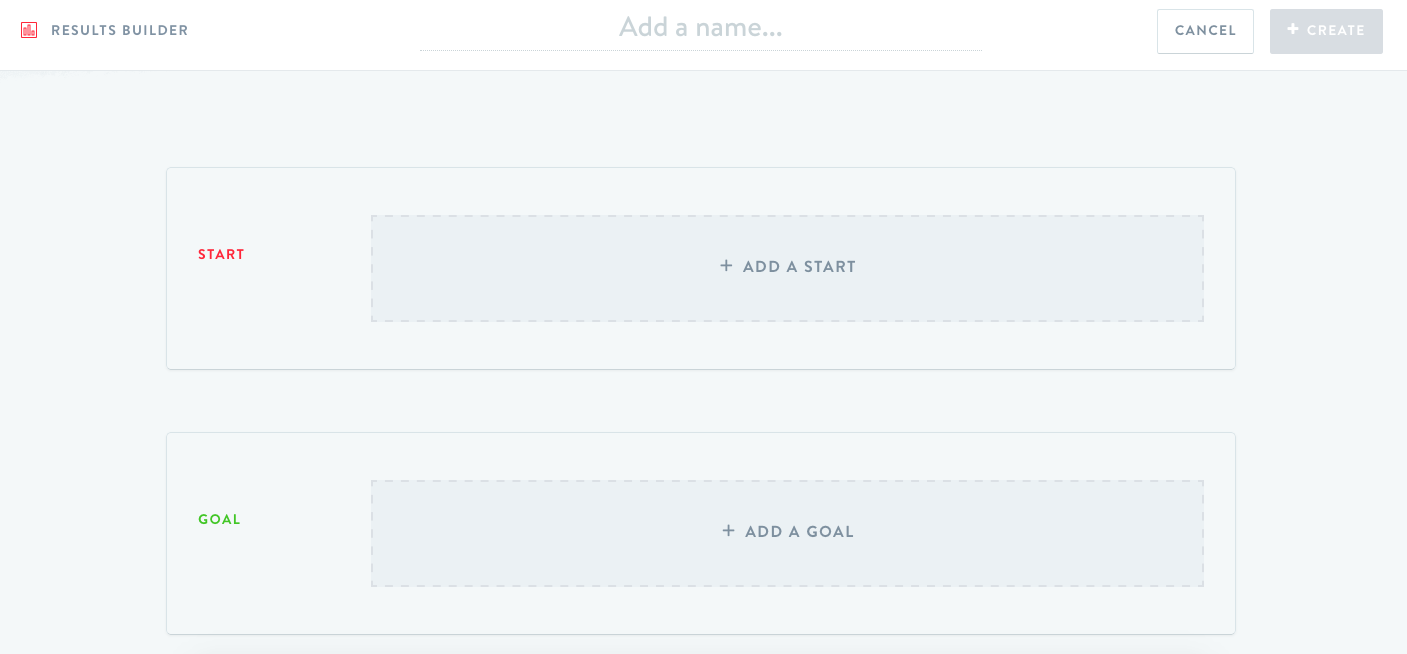
All funnels require a start point and a goal. A start point can be virtually anything - engagement with a specific email campaign, inclusion in a Simon Flow, a specific type of order, a return, or virtually anything else that lives in your core data (and has a user identifier and timestamp). Below, we’ve clicked “Add a Start” and selected “Order” as our starting category.
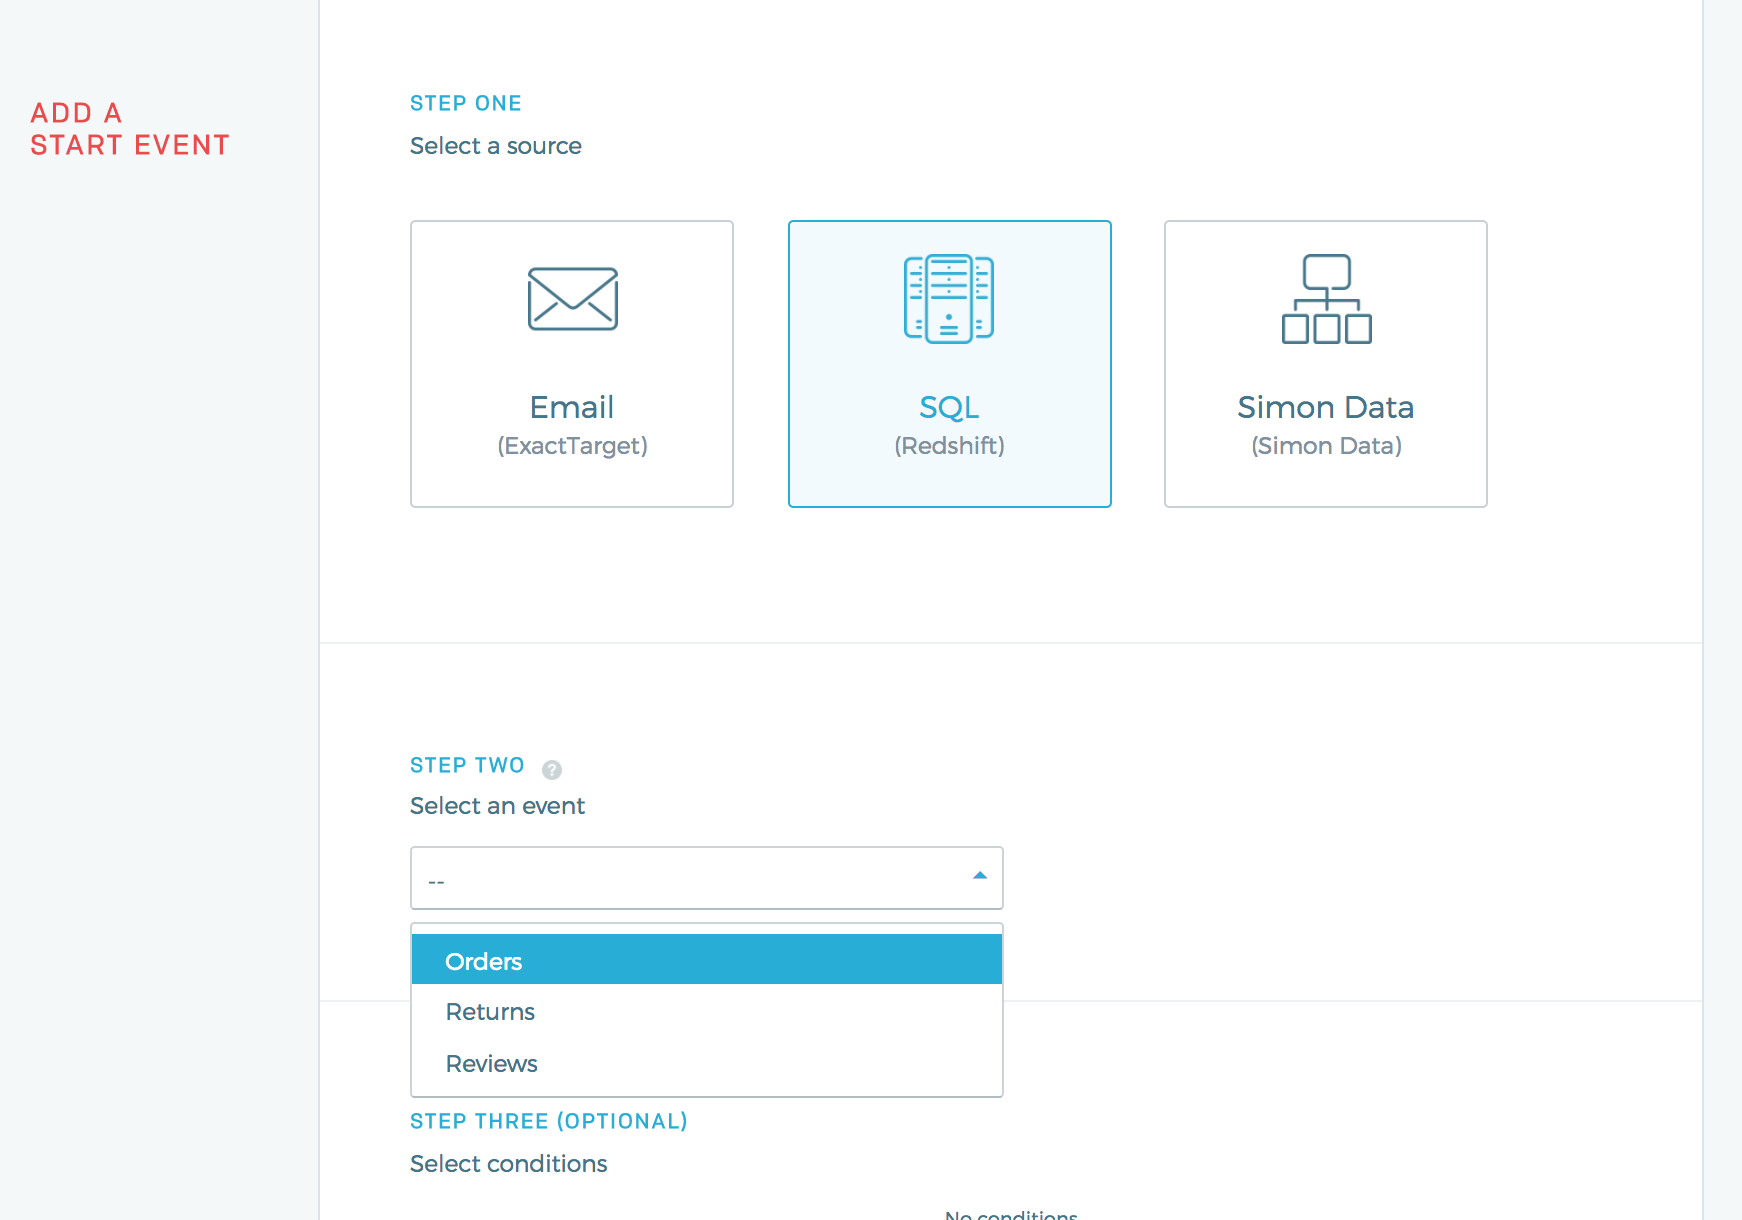
We can then further refine this funnel entry condition by choosing a specific product SKU, category, etc:

Here, we’ve chosen "Product Name” as our initial refinement, and we have a set of contextually linked options for products. Note that each option has a count associated with it - this count represents the total number of people in your data that have taken this action:
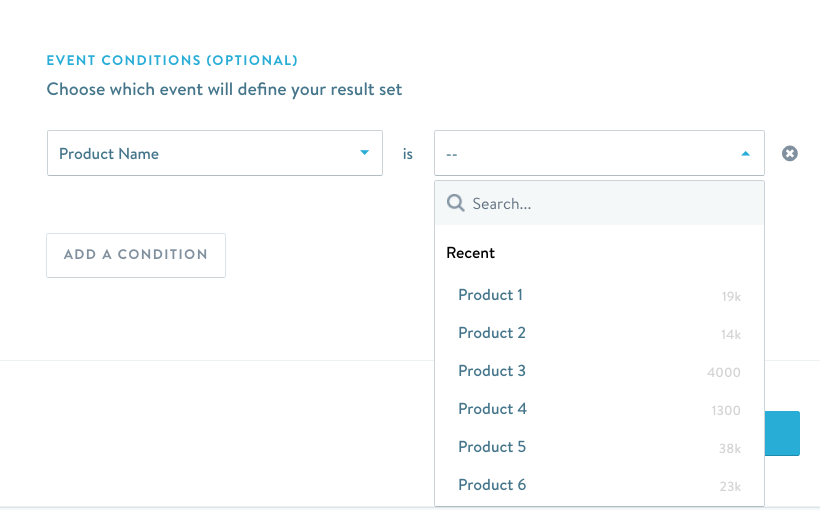
You can add multiple refinements for any entry condition, such as a specific product order type and promo code. As with almost any condition within Simon, you can match all or any.
For now, let’s just build a view with “Product 2” as the start.
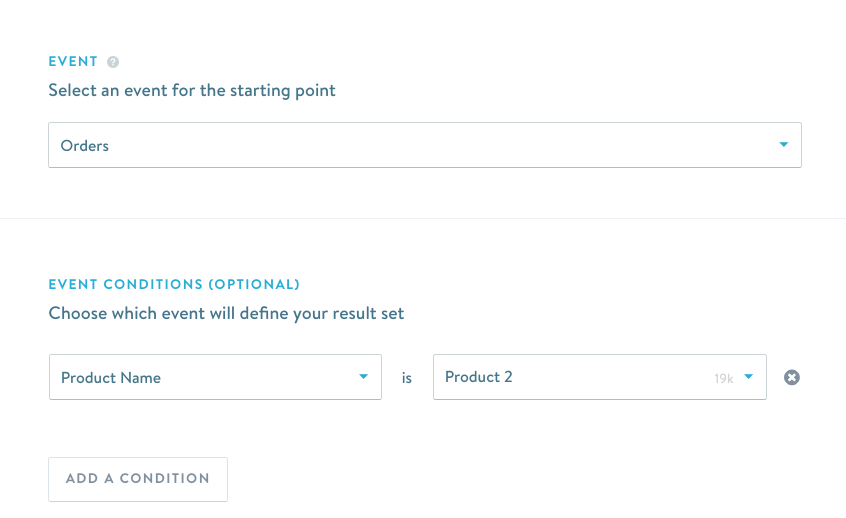
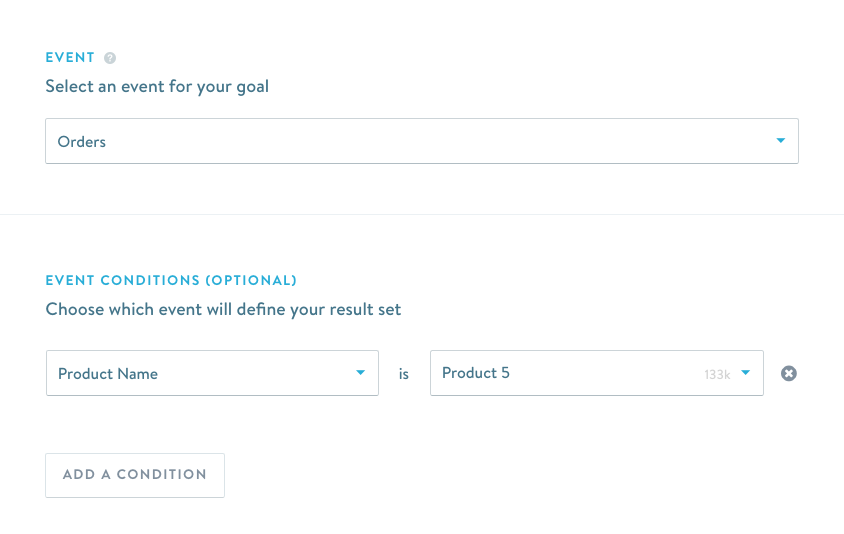
Once you’ve created your start point, you’ll need an end point for your view. We call this your view “goal”. Choosing a goal is virtually identical to choosing a starting point - you simply choose the data source for the view. Below, we’ve again chosen our source as “Redshift” and “Orders” as our initial goal category.
We will again use “Product Name” as our refinement; this time, we’re choosing “Product 5” as the goal order. Again, as above with our Start, the number to the right of “Product 5” represents our raw count of the number of folks who have ordered “Product 5” (note that this number is not yet adjusted for the Start condition):
Having chosen our goal, we hit “save”, and are returned to the Simon Results creation screen. Here, we can see that we now have both a Start and a Goal defined. Now, it’s time for milestones.
Understanding milestones
In almost any customer funnel, things happen along the way. For example, between first and second purchase, a customer might do any number of things: they might open a specific email, visit a specific web page, or engage with customer support.
In the case above, before completing our funnel (buying Product 5 after purchasing Product 2), a customer might choose to review Product 2. They might do so favorably or unfavorably. Subsequently, they might open a cross-sell email promoting Product 5 and click on it. They might visit a PDP (product detail page) for an “Intermediate Product” a week later, and then make a purchase. They may even make a different purchase.
In Simon Results, we call these interstitial steps milestones. Milestones are a critical part of the customer funnel, as they help us understand the pattern of customer behavior within a funnel. This understanding allows us to identify key friction points or supporting completion elements within a funnel, as well as improve our marketing efforts to customers within those funnels.
For example - if we learn that many folks purchase an Intermediate Product in between making a Product 2 purchase and a Product 5 purchase, we might change the order of our post-purchase journey. We might make tweaks to bundles that we’re pushing within specific time windows. Or we might adjust how we retarget recent Product 2 purchasers on Facebook.
Let’s explore different types of milestones within the example above. Creating milestones is very similar to creating Starts and Goals within the Results builder. First click “Add a Milestone”:

Now, choose a data source for your milestone. As mentioned above, milestones can be virtually any customer behavior or action that took place between the Start and Goal of your funnel. Let’s start by putting an “Intermediate Order” milestone in:
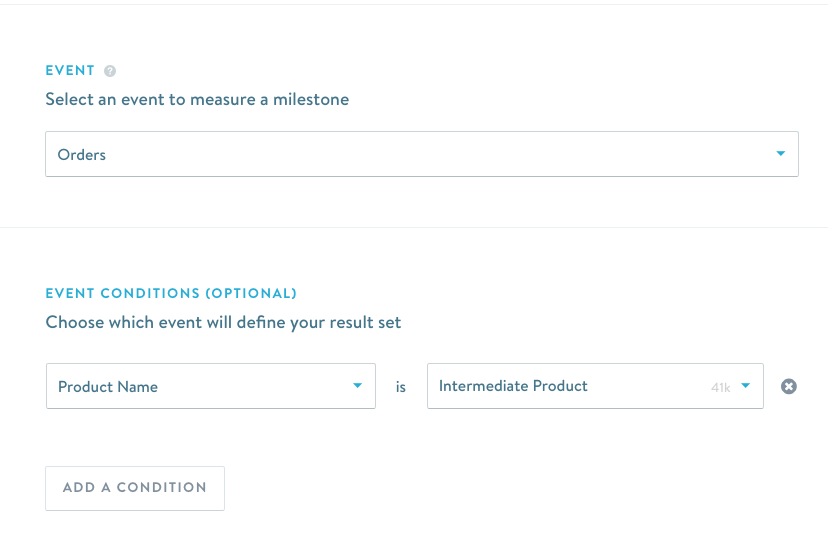
As above in Goal/Start Creation, I choose Redshift as my data source, I choose “Orders” as my category, and I choose Product Name as my refinement. I’m going to select “Intermediate Product” as my specific product. If I want, I can layer in additional conditions to refinement my milestone (e.g. promo codes used, etc). For now, let’s keep it simple.
Saving the milestone is identical to saving Starts and Goals. Below, we can see that we now have a milestone for this View, in addition to the Start and Goal we’ve built. Now, let’s add a few more; of particular interest to many marketers is specific email campaign engagement within a funnel. Let’s take a look at how that works.
Email campaigns as milestones
Now we’re going to add a second milestone. This milestone will be a specific email campaign whose relative efficacy we want to understand, as it relates to the funnel in question (Product 2 -> Product 5).
Here, we’re going to start by clicking add milestone and selecting email service provider “SendGrid” as our data source. Immediately, you’ll notice that there is a completely different set of contextual options for email, including Email Delivered, Email Open, Email Click, and so on:
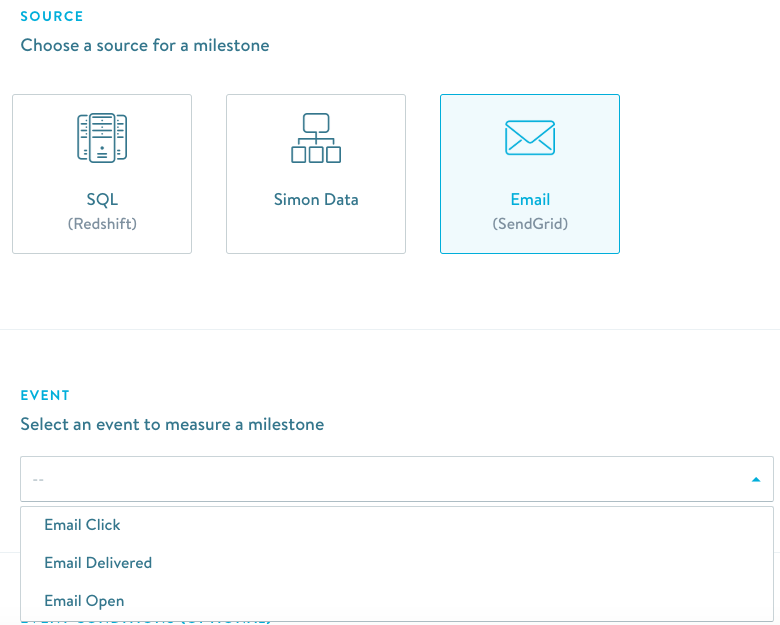
Simon Results has been purpose-built to help you measure contribution your email campaigns are making to lifecycle performance and topline revenue. Doing this requires a deep set of contextual options, and each has its own use case.
The Sends/Delivery and Opens options are the most important, and you should familiarize yourself with them as soon as possible. Essentially, they are their own “mini funnels”. Once selected, the milestone sub-report will give you everything downstream of that specific event. So, for sends, you’ll have small indicators for opens, clicks, unsubscribes, and bounces. That view looks like this:

For opens, you’ll have a similar view, except one that excludes sends, as this particular milestone requires you to have opened the email. You can see an example of that view here:

For all other email milestones, you’ll receive just a basic milestone view, which - let’s take clicks, for example - looks like this:

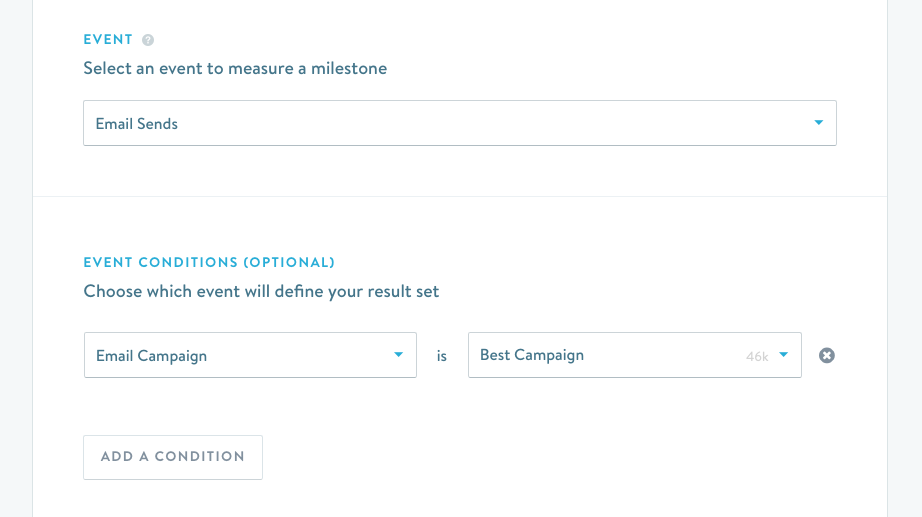
For this particular view, let’s start by evaluating an ongoing post-purchase campaign - say, our post-purchase cross-sell. To do that, we’ll first choose “Email Sends” as our group, and then we’ll choose a specific campaign in the conditions drop down.
We select the campaign here. Note that you can search through conditions, rather than scroll - easy! Additionally, as with the orders view, you can see how many specific instances of a particular campaign have been sent. Here, we can see that this specific campaign has 46,000 sends associated with it:
Once we’ve chosen the campaign we’d like to understand, we simply hit “save”, and we now return to the View creation page. We can see that our milestone now appears below our Start, Goal, and Order Milestone.
Finishing touches
Adding additional milestones is easy - you can simply click “Add Milestone”, and choose from any of the available data in the platform. Currently, we support as many milestones for a given view as you'd like - however, more than five can become cluttered. Please note that adding a significant number of additional milestones can increase View creation time.
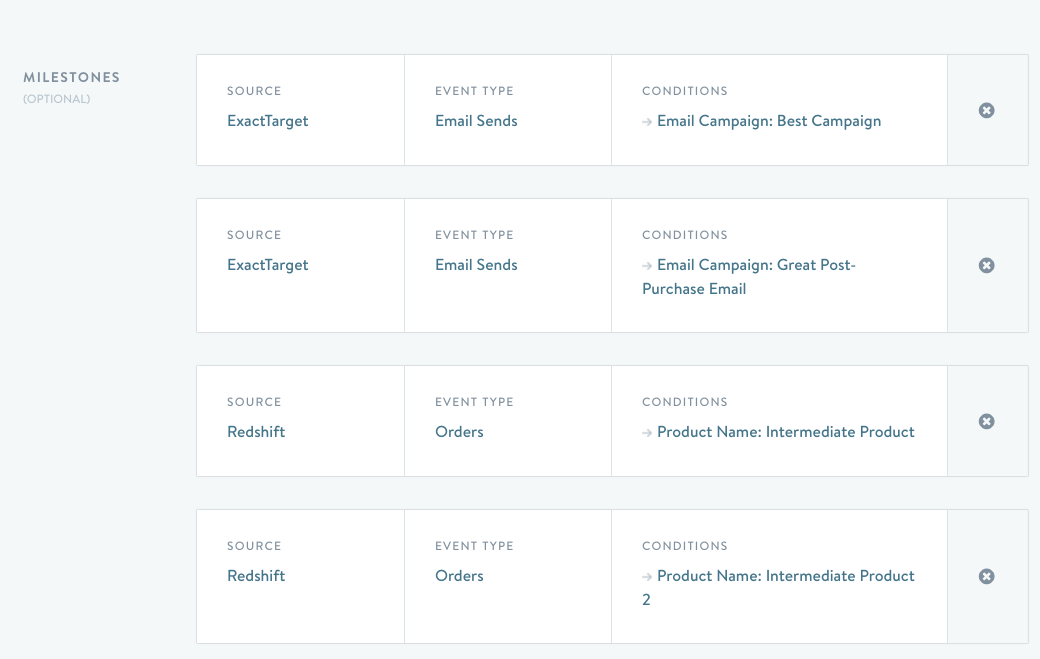
To keep things moving along, we’ve added a second email send (a second post purchase email) and a second order (Intermediate Product) to our milestone list, bringing us to a grand total of four milestones:
Now, all we have to do is simply name our View and click the “Create” button. Let’s call it something appropriate - like “Product 2 to Product 5 Funnel”. As with segments, you may use the ‘:’ to create a folder here. Let’s do that too, just to keep things clean. We’ll call this View “Test: Product 2 to Product 5 Funnel”:

With all that complete, we’re ready to look at our result! Click “create”, and let’s get going!
Updated 3 months ago
