Template settings
Create a new drag and drop template
- From the left navigation, expand Campaigns then click Content.
- Choose an existing template to edit or click Create Template to start a new message.
- Choose Drag and Drop Editor the click Choose Builder. Once you choose this option, you can't switch to Template Editor (HTML and Jinja), but you can include HTML blocks in the drag and drop editor if you need to.
- The editor opens.
Review drag and drop editor for a UI overview.
Name your template and set message details
- To begin, name your template. This is not your message subject, but something you can use to find the template again later in the content list.

Template name
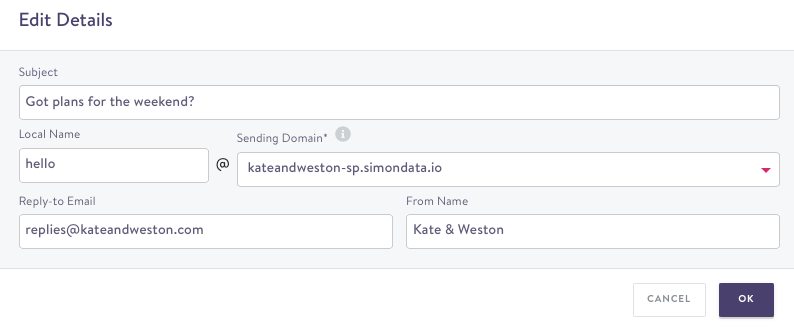
- Click the cog to the right of the template name to edit the send and reply details:

Send Details
- Subject: Type a subject line for message.
- Local Name: Choose any name to appear before the @ in your send email.
- Sending Domain: From the drop-down list, choose an email domain.
- Reply-to Email: Include an email to receive messages should your customer reply to your message.
- From Name: The display name you want to appear in your customer's inbox.
Click OK.
Continue to Message settings.
Save default settings
At this time, you can't save default email template settings to re-use across multiple email templates. (You can set a default font on a per template basis.)
However, there may be many ways to still meet your design team’s needs. For example, some Simon Mail users build a set of templates with their preferred styles then reuse or copy those templates for future use. We recommend you clearly label these templates for your own default use as you'll have to manually keep them categorized for your future use. If you have any other questions, please contact your account manager.
Updated 3 months ago
