Delays
Delays
- If you'd like to delay before starting the next step of your journey, add a Delay.

Delay
- The delay details window opens:

Delay Details
- Basic Details: Name your delay. Add a note for yourself or team, if needed.
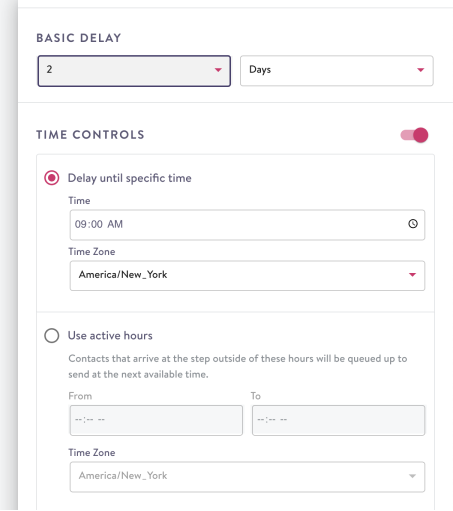
- Basic Delay: Choose a delay time in minutes, hours, or days.
- Time Controls (optional): Additional controls around the time of day and respective time zone to advance to the next step.
There are two options under Time Controls:
- Delay until specific time (only available for day delays): A specific time of day to advance contacts (you can think of this as 'send time').
- Use active hours (available for all delay settings): A window of time where contacts can advance. This is useful e.g. if you want to avoid messaging contacts during the night. If a contact is set to advance at a time that falls within the window, they will do so. If a contact is set to advance at a time outside the window, they will be queued up until the window opens and advance then. The window for active hours must be between 4 and 20 hours long.
If no time controls are set, the delay will be just the specified duration. In the case of day delays, that duration is calculated as 24-hour increments
You can add a delay at any step in your journey. You can also add a delay even after you've set up subsequent steps by clicking on the + on the connector line:
Controlling time of day
- What you would configure under "Send time" in flows previously, is now defined under delays.
- Day delays have additional settings for the time of day. By default, a day delay advances at the same time of day (i.e. in 24 hour increments). You can also configure a specific time when contacts will advance from the delay. In that case, the number of days is based on calendar days in the configured time zone.
- If you want to configure a specific time of day without additional delays, you can set a 0 day delay and then define the send time.
Use contact timezone
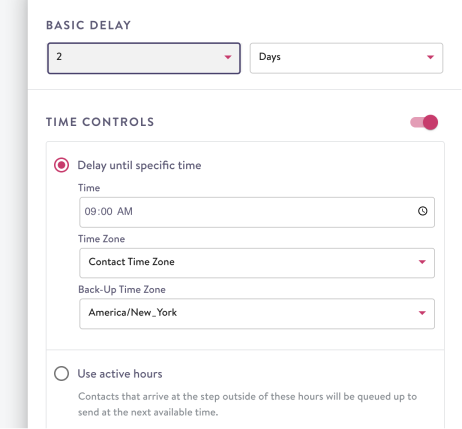
Instead of specifying the same timezone for all contacts, you load contact-level timezone data into Simon and use that to specify the timezone in a delay step. This way, the time settings for each contact will be based on their timezone.

You can use the local timezone for each contact to specify the time of day.
Using local timezone requires that you have provided timezone data for your contacts. Contact Simon if you have that data and would like to set it up to be used in journeys. Simon accepts standard database timezone names. Once the per-contact timezone data has been set up, 'Contact Time Zone' will load as a default for journeys time settings. A back-up timezone is also required in case a timezone is not available for some contacts. Just like other timezone settings, local timezone will be used for any time-settings, including delay until specific time, active hours, or day-breaks in day delays.
Use an optimized per-contact time
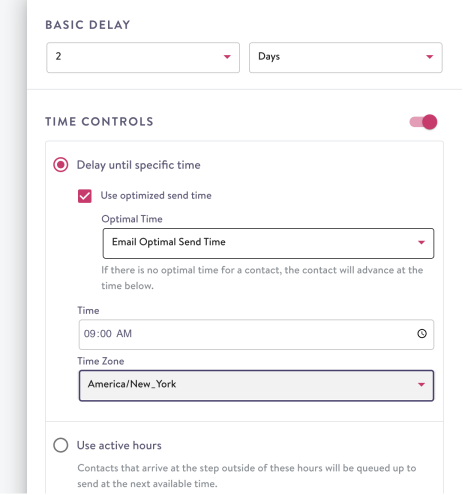
Time optimization is available as a toggle under “Time controls” for delay steps that are configured with a “days” as the delay. When a journey is running with this option, it will advance each contact at their optimal time based on an individual. E.g. if the data tells us that one contact is more likely to engage with messages in the morning, they would advance at that time. If another contact is responds better in the afternoon, they’d advance at that time. Using optimized time requires that you have provided timezone data for your contacts. Contact Simon if you have that data and would like to set it up to be used in journeys.

You can use a per-contact optimal time to determine when to advance contacts
While Simon allows all customers to set their optimal send times using their own data, Simon Data also provides an Optimized Send Time model that delivers personalized send times to our customers' contacts. This model is available if you have Simon Mail or Sendgrid as your ESP. If you want access to Simon's Optimized Send Time model, please contact your Account Manager!
Updated 3 months ago
