
Create a Segment in a Connected Deployment
Once you've connected to Snowflake, selected your tables in the Schema Builder, and authenticated destinations as outlined in the Connect Deployment section, you're ready to start building powerful segments right in Simon!
Create a segment
- From the left navigation, click Segments.
- Click Create Segment.
General Information
- Name your Segment, and optionally click Add Description to add a description. We recommend including a description that describes your segment's goals so you and your peers can effectively leverage the segment in flows later.
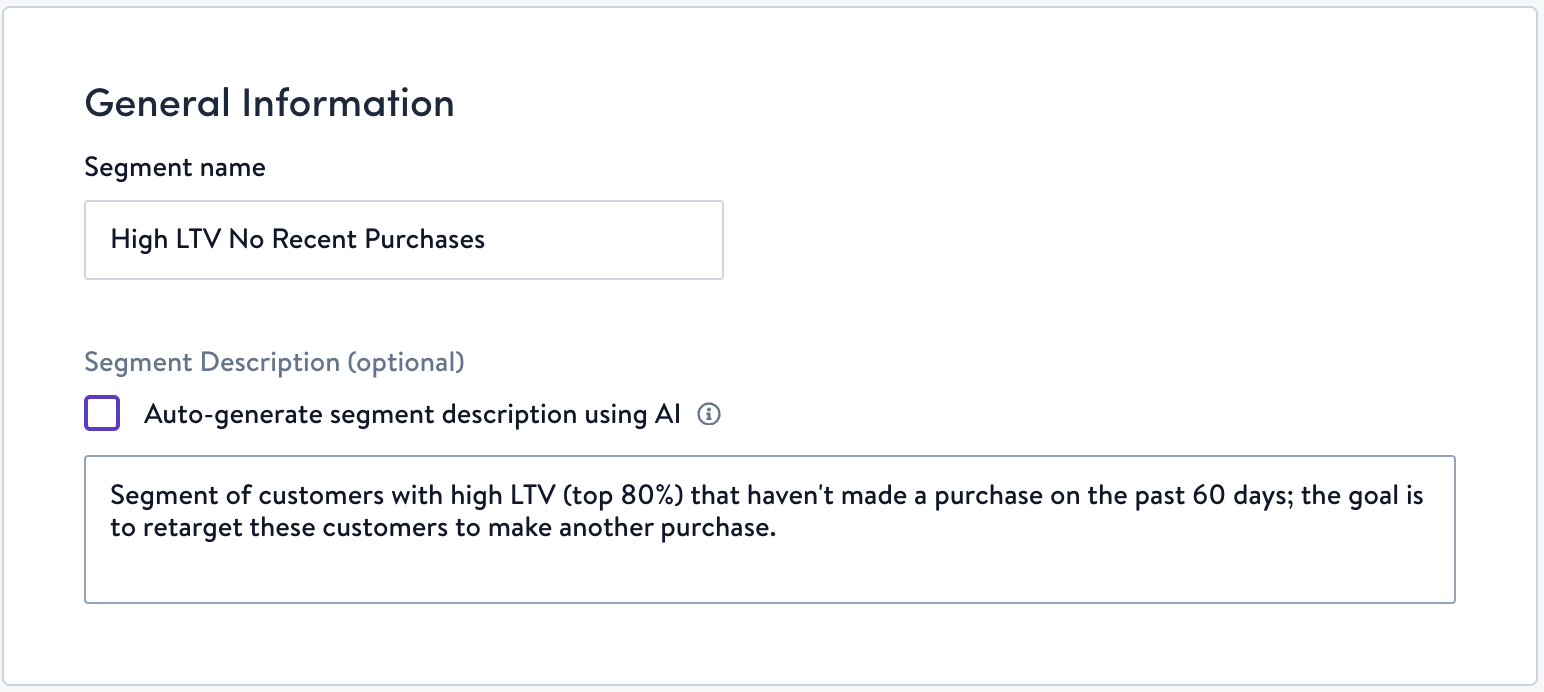
You can also choose to auto-generate your segment description using AI. It generates as you choose properties:
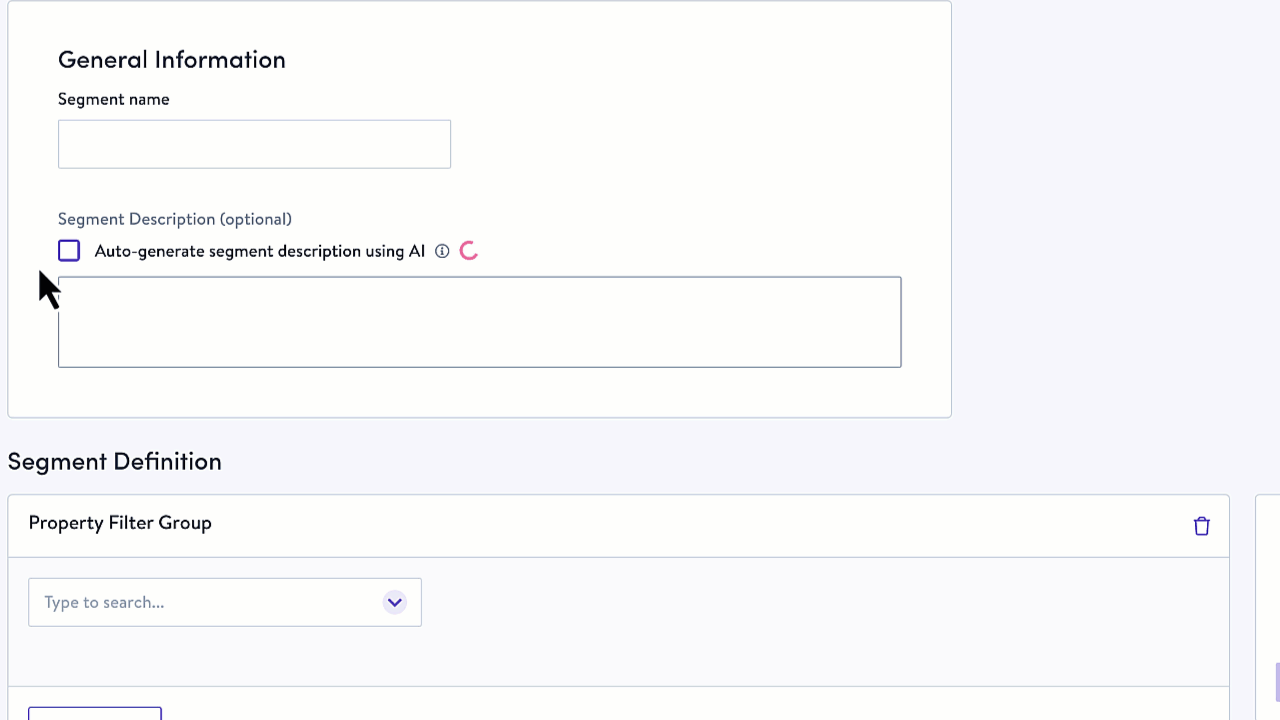
Segment Definition
Criteria definitionsYou can review segment criteria definitions in more detail here.
In this section, introduce property filter groups and event filter groups to focus your segment. Choose either property filtering or event filtering, or combine the two with multiple filter groups.
- Choose any field that exists within any of the connected tables brought in by the schema builder to segment from
- Click Add Filter to add additional fields. Toggle between and/or logic by clicking on either:

- For more detail on segment condition groups and criteria including qualifier definitions, review Segment criteria and conditions.* Looking for more fields? Add Snowflake tables and fields in the Schema Builder.
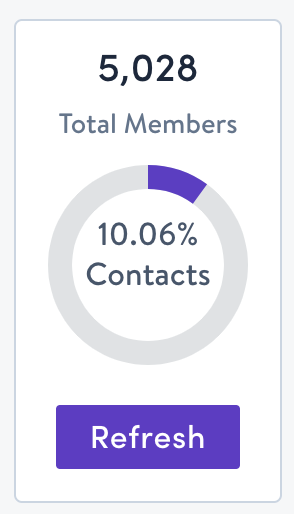
- Click Fetch KPIs to view the current count of contacts in this segment base on the data in your Snowflake instance, allowing you to control the size of your segment:
- Click Refresh Schema at any time to sync with any changes to your Snowflake schema, and represent the most current version of your Snowflake table right in Simon.
Make field type changes in SnowflakeWe determine the set of operations you can perform on a field in the segment builder by the type of that field in Snowflake.
Include both Event filters and Property filters
Click Add Filter Group to add an additional Event or Property filter group. Click And/Or to toggle between the two options:
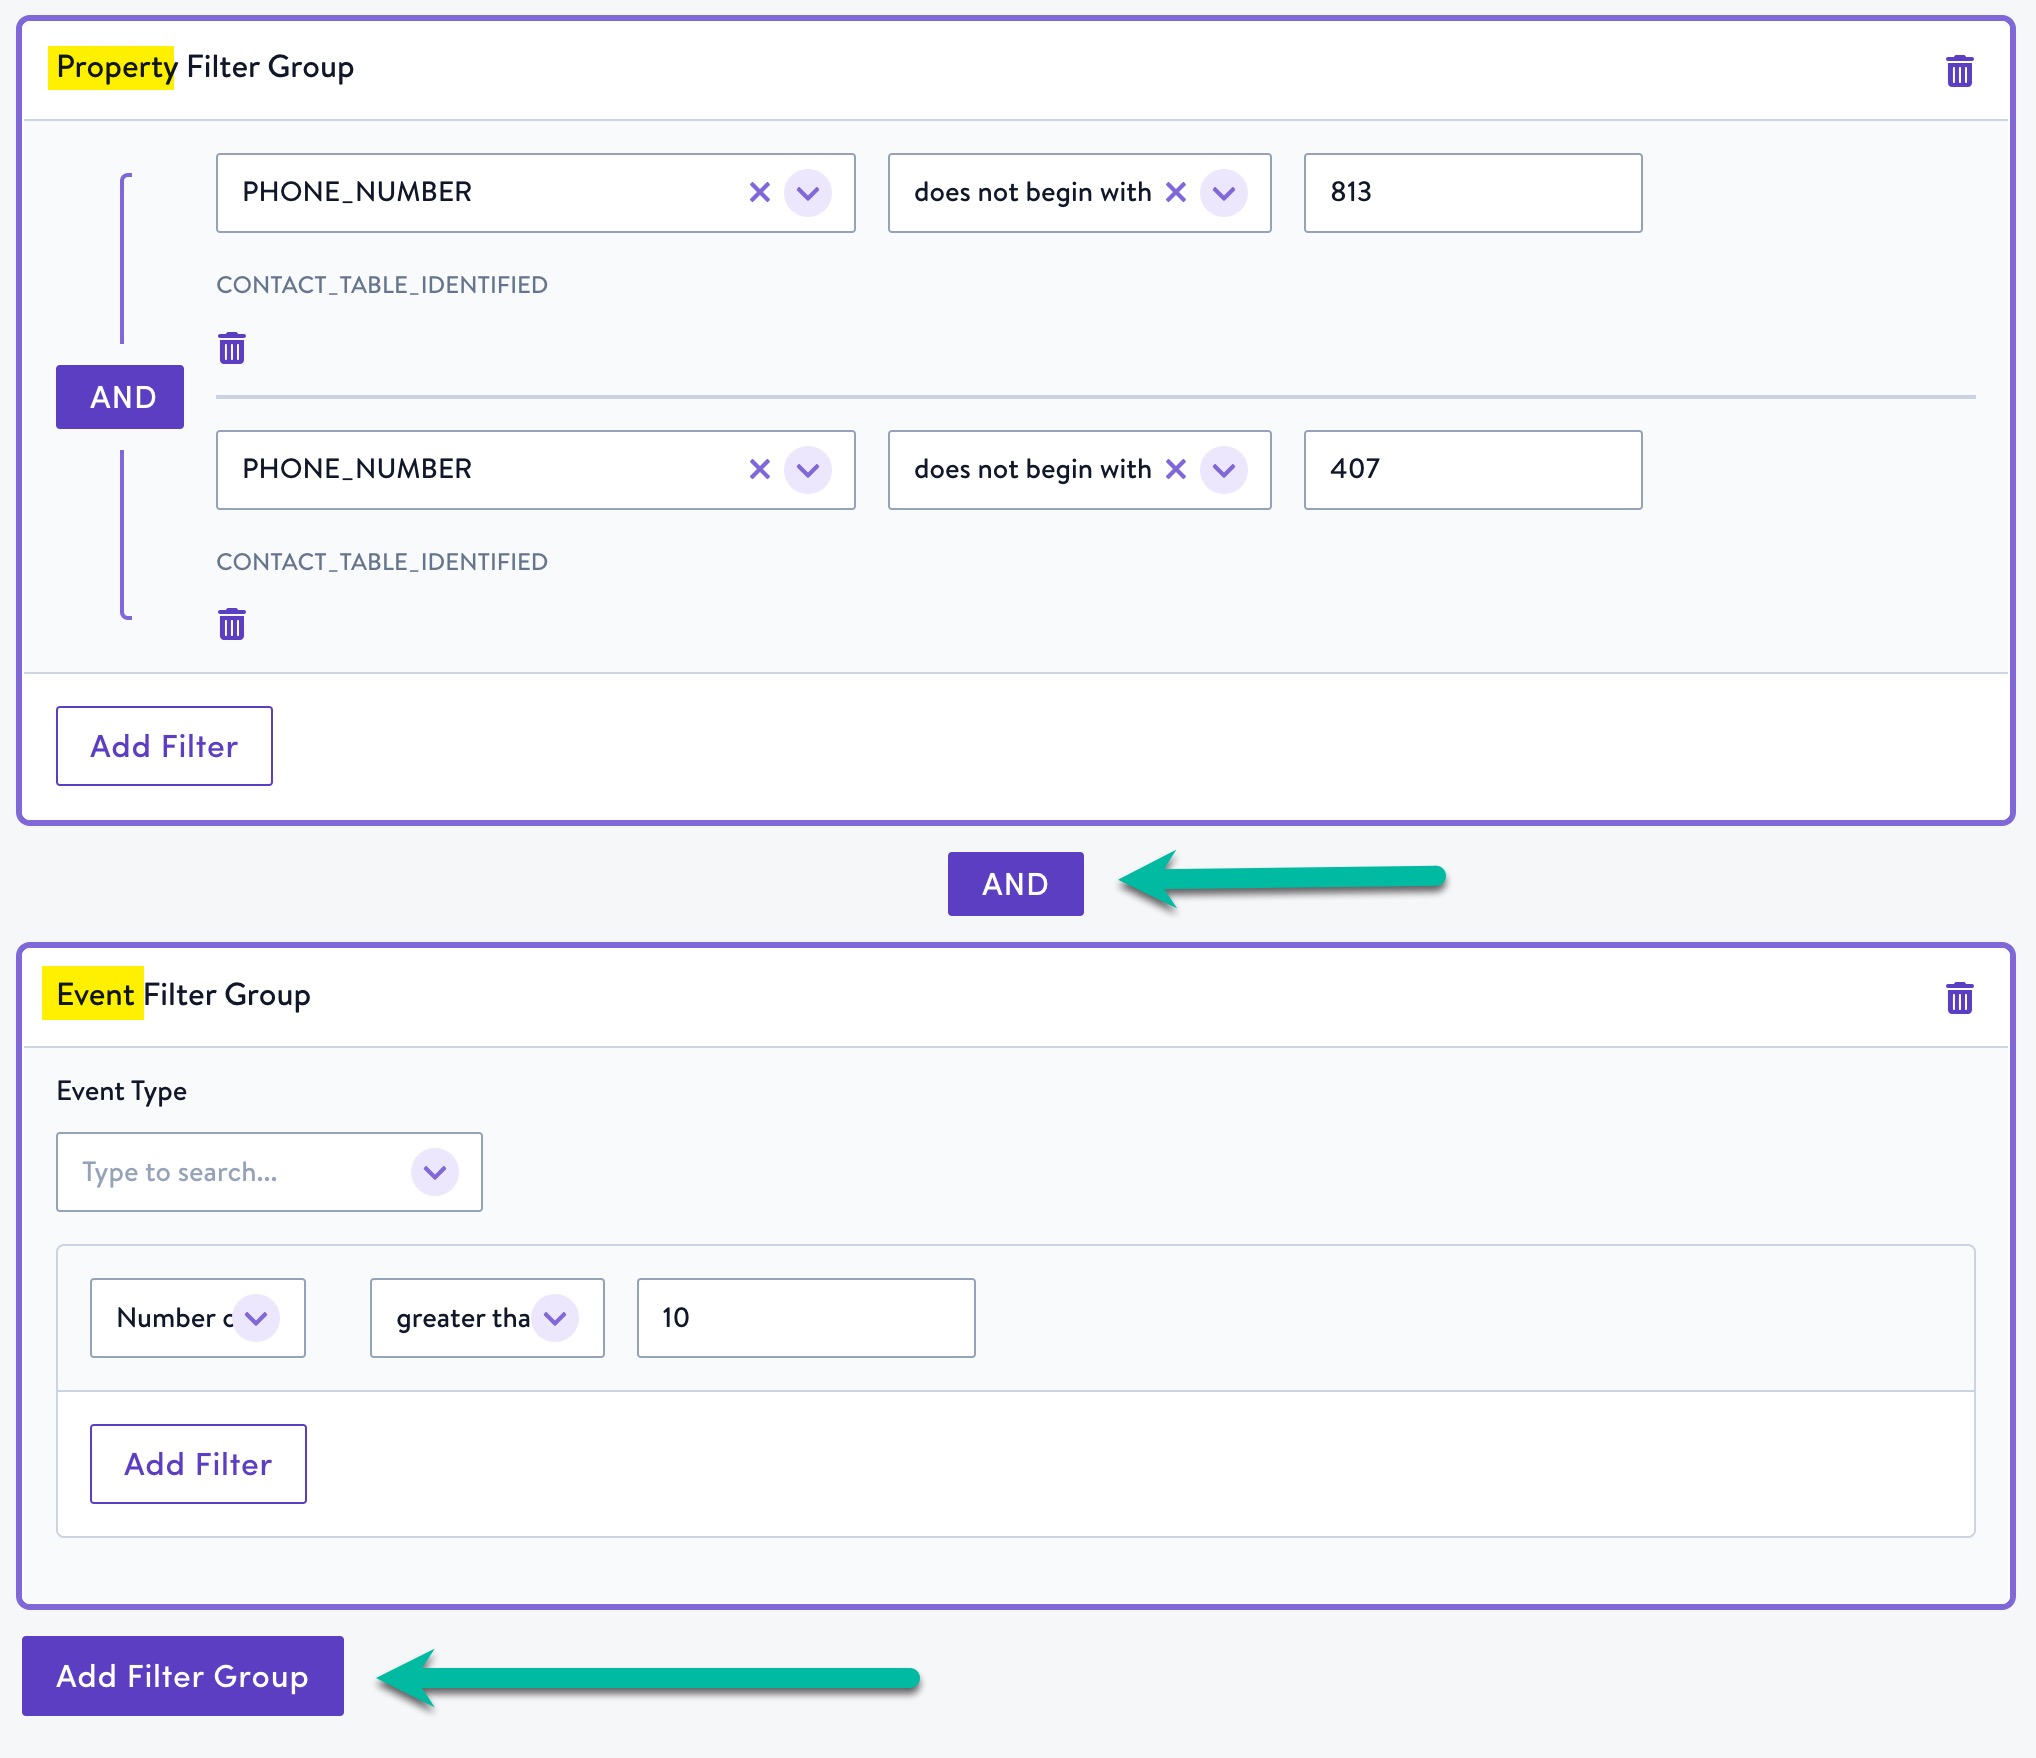
- When you select a property, the name of the table the property belongs to displays in grey in the drop down, and then again below the property in the segment definition.
- Each event type in the drop down corresponds to an event table in the schema builder, and the filters applied to event types correspond to the fields in each event table to allow you to further refine the events that meet your criteria.
Include all customers
Delete all the filter groups to include all contacts.
Save
Review your segment to confirm it meets all your goals as outlined in your optional description. When you're satisfied, save your segment then continue on to create a flow with it!
Edit
You can edit a segment. From the segment list, click the segment title then click Edit Segment.
You can't currently delete a segment, but it's on the roadmap for future changes.
Your segment in Snowflake
When you save a segment, we automatically save a view in your Snowflake instance with the logic defined by that segment. Find this view at SD_SEGMENT_<SEGMENT_ID>_<SEGMENT_NAME>. (The database and output schema are specified in the Snowflake credentials when you authenticated).
- Because the segment is stored as a view, it recalculates whenever you query it. There's no need to refresh the data manually when you query the view because it will contain the most current data.
- The view has one column that contains all of the
simon_idsfor the contacts that fall into that segment.
Updated 9 months ago