Lookup tables
What are lookup tables?
In Simon Data, lookup tables are a way to efficiently use data that is not contact-specific when dynamically inserting content into a message.
10 Tables MaxYou can have 10 lookup tables max. Contact your account manager with any questions.
How do lookup tables work?
There are a couple of concepts that are key to understanding Lookup tables in Simon Data: the first one is the idea of a lookup key, and the second one is Custom Context.
Lookup key
The lookup key is simply an identifier that you store with the contact which allows you to identify a single product in the catalog. This is often a sku. Each lookup table is set up to have a specific key, and each contact needs to have at least one entry with a key to be able to retrieve data from the Lookup table. If you wanted to include information about several products, you’d have several keys, e.g. sku 1, sku 2 etc. In some cases, the key may be coming from a event data rather than the contact, and this is also supported in Simon Data. Just remember: without a key, there is no lookup.
Templates and Custom Context
As we mentioned earlier, another key concept for Lookup tables is Custom Context, which is at the heart of the Simon Data templating engine. Custom Context give you the ability to dynamically insert data into a template before it gets sent. If you’re working on an email, you can retrieve personalized product information that is stored in Simon Data and insert it into your ESP template using substitution tags (also known as merge tags or a range of other names). For some other actions, such as push messages, the entire message may be composed within Simon Data.
A simple example of a Custom Context would be adding a name to the subject line. A more advanced example would be looping through the items in an abandoned cart and inserting the html to display the information for each product. Custom Context are snippets of code that tells the template engine to retrieve and display a piece of data, or that gives it other instructions about what to do.
Setting up lookup tables
These are the steps to set up an email message using Lookup tables:
- Create a lookup table dataset
- Create a flow in Simon Data
- Send a test message and launch the flow
While this guide is attempting to get you up and running quickly, the Simon Data team is available to assist you at every step of the process. There are a lot of different options for how to set this up, and we are happy to guide you towards what suits your needs the best.
Create a lookup table dataset
Lookup tables are set up by querying your data warehouse and loading the data into the Simon Data platform. This is done in a similar way as with other datasets, and can be done within the Datasets part of the UI or by the Simon Data team.
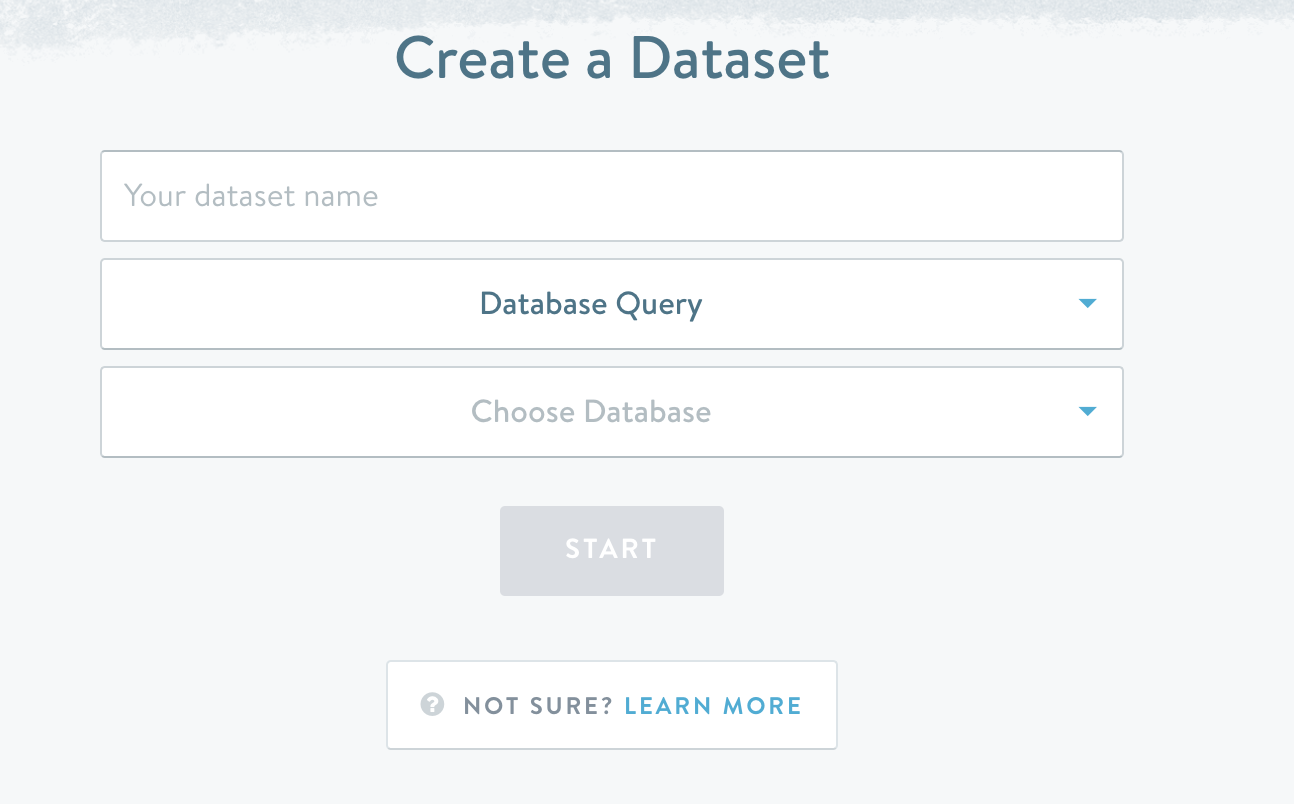
Select 'Create Dataset' and select the purpose of Lookup Tables.
Define the source of your lookup table. This will usually be a database, but we also support file uploads. If you are using a database, select the database from the dropdown.

Selecting the source of your lookup table
If you are uploading a file, select the file and upload it. If using a query, enter the query in the editor. In both cases, you need to go through the process of loading and validating the data, defining the index and selecting the datatype for each field (see Creating and Updating Datasets for more information).
Once a lookup dataset has been committed, fields can no longer be removed, and the index and datatypes cannot be changed. The data ingestion process will try to cast the field according to the type defined here. You can then take advantage of type-specific filters and functions then become available in Custom Context. The default type is string.
New lookup tables will generally become available after a data refresh. You can start using a table once it appears under Lookup in the Custom Context editor (see below).
Lookup data types
Lookups support the following data types:
- String
- Date
- Boolean
- Float
- Integer
Handling currency fieldsCurrency values can be defined as Integer. Even if there are decimals, those will be preserved and shown when the field is used.
Create a Simon Data flow
Set up a new flow in Simon Data, making sure to pick the template that you have already set up in your ESP. Custom Context are available for all types of flows. If you are not already familiar with Custom Context, start out by reading our guides to Custom Context.
Once you’re familiar with the basics of working with Custom Context, we're ready to tackle Lookup tables.
Using lookup tables
We already mentioned that we need to use a key when referencing data in a Lookup table. In this example, we will use a key that is stored for each contact in the customer database.
Data types in older lookup tablesSimon has expanded the support for data types during 2019. Older tables did not have the same data types available. You can see the data type for any lookup property in the UI.
A lookup has the following format:
{{ lookups.<table_name>[<key>].<column_name> }}If we substitute the fields within <> with an example for a table named product_catalog and a key of "12345" and a column name of productName, we’d get something like this:
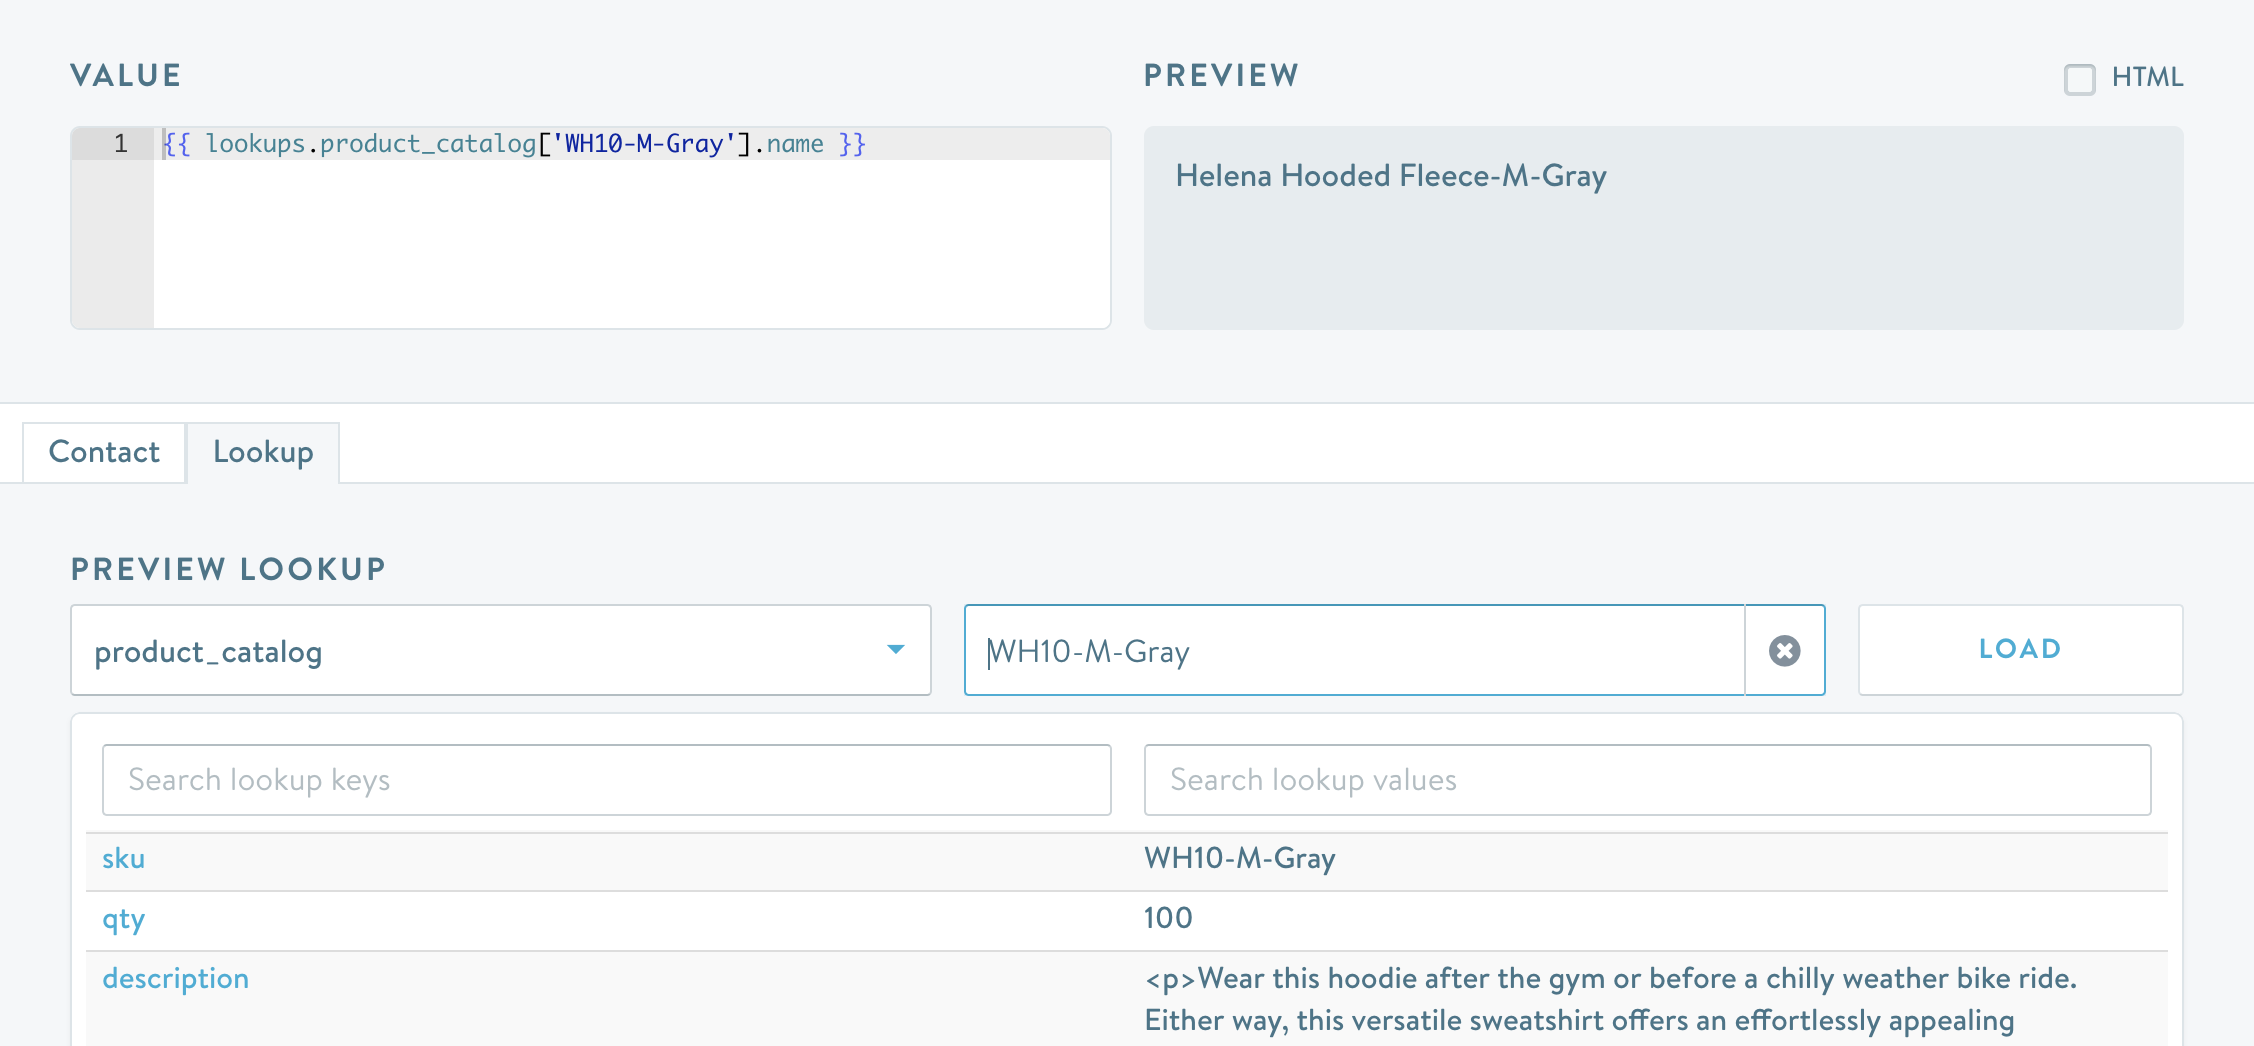
{{ lookups.product_catalog['12345'].productName }}This expression will display the product name for the key 12345 from the product catalog. If we wanted to display the same product for all the contacts, we would be fine just adding our error handling and using this type of expression. The below screenshot shows an example:
Just to make sure we don’t forget about adding default values, here is an example:

  {% if lookups.product_catalog['WH10-M-Gray'].name %}{{ lookups.product_catalog['WH10-M-Gray'].name }}
  {% else %}
  A default value
  {% endif %}
You can confirm the type for a lookup field within the Custom Context editor using the type() function, as in:
{{ type(lookups.product_catalog['WH10-M-Gray'].name) }}Using a Contact key with Lookup tables
If we want to personalize the product name for each contact, we need to take one more step. Based on what we’ve learned previously about Custom Context, we could display the key for a contact with something like this (the specifics will depend on the field names for your database):
{{ contact.sku }}This is helpful when validating that the data is there, but in order to use it with a lookup table we’ll need to combine our last two examples. A lookup which uses the key from a contact with a lookup table could look like this:
{{ lookups.product_catalog[contact.sku].name }}This will retrieve the individual sku for each contact and look up the product name for that sku. We have now achieved showing the right product name for each contact without needing to store the same product information over and over again.
When we add error handling to this expression, it might look something like this:
  {% if contact.sku and lookups.product_catalog[contact.sku].name %}
  {{ lookups.product_catalog[contact.sku].name }}
  {% else %}
  A default value
  {% endif %}
If we are going to be using the contact property in many places, we can make our syntax a little less repetitive, by retrieving the sku just once and storing it in a variable:
  {% set product = contact.sku %}
  {% if product and lookups.product_catalog[product].name %}
  {{ lookups.product_catalog[product].name }}
  {% else %}
  A default value
  {% endif %}
Send a test message and launch your flow
Once you’ve set up your flow, you can test it using 'Send a test' at the bottom of the action set-up. Remember that you can save a draft of your flow at any point by first saving the action and then clicking on ‘Save for Later’ in the top right part of the window. Once you feel that your flow is ready, go ahead and launch it.
Using Contact Event data with datasets (aka "Linked Lookups")
Let's look at a purchase events example to understand how linked lookups are used in Simon. In a typical data warehouse, information about a customer's order and the products ordered are typically stored on separate tables. On the orders_table, we may store references to the products, like a product_id, but information like the product's weight, color, SKU, inventory are not replicated directly onto the orders_table. If we want to craft personalized messages about a customer's order using any product details, we can take the product_id from the orders_table and access any attribute we want from the products_table.
Now imagine how tedious it would be if we had to manually write out joins every time we created a contact event dataset that needs to understand how an event relates to a product. Instead, we can create that products table once in Simon as a Lookup Table. When configuring contact event datasets, we use linked lookups to help us mirror the real-world construct of relational data across separate database tables; by applying a lookup to an event field in a contact event dataset, we signify that the field corresponds to the identifier on a different lookup table. Think of it like a foreign key in a SQL table, except in this case, the lookup field must be populated in order to relate the event to the lookup when composing custom context.
You can use existing linked lookups when you create a Contact Event dataset.
Lookback based on Contact Event Dataset Category
| Contact Event Dataset Category | Lookback classification | Lookback period |
|---|---|---|
| Other | Behavioral | 30 days |
| Add to Cart | Behavioral | 30 days |
| Abandoned Cart | Behavioral | 30 days |
| Page view | Behavioral | 30 days |
| On-site Activities | Behavioral | 30 days |
| App Activities | Behavioral | 30 days |
| Survey Completion | Behavioral | 30 days |
| Registration | Behavioral | 30 days |
| Email Send | Channel Events | 90 days |
| Email Open | Channel Events | 90 days |
| Email Click | Channel Events | 90 days |
| Email Unsubscribe | Channel Events | 90 days |
| Email Bounce | Channel Events | 90 days |
| SMS Send | Channel Events | 90 days |
| SMS Click | Channel Events | 90 days |
| SMS Unsubscribe | Channel Events | 90 days |
| SMS Bounce | Channel Events | 90 days |
| Push Send | Channel Events | 90 days |
| Push Delivery | Channel Events | 90 days |
| Push Click | Channel Events | 90 days |
| Push Bounce | Channel Events | 90 days |
| Flow Adds | Channel Events | 90 days |
| App Download | Transactional | 365 days |
| App Uninstall | Transactional | 365 days |
| Subscription Activation | Transactional | 365 days |
| Subscription Skip | Transactional | 365 days |
| Subscription Cancellation | Transactional | 365 days |
| Subscription Reactivation | Transactional | 365 days |
| Completed Transaction | Transactional | 365 days |
| Purchase | Transactional | 365 days |
| Return | Transactional | 365 days |
Updated 2 months ago
