Send a one-time message
Before you begin:
- Confirm the dataset you need is set up.
- Create a segment or identify the segment you'll use. Write the segment name down; you'll need it soon.
- Consider using an experiment to test the effectiveness of your flow prior to publishing it.
- Consider what you want this flow to do. Explore Flow Action Types for options.
One-time send exampleFor this example, we'll set up a one-time message. This is the basic walkthrough for all flows, but for more details specifically on recurring flows, click here.
Getting started
- From the left navigation, click Create Flow. You're presented a flow name field and flow type choices:
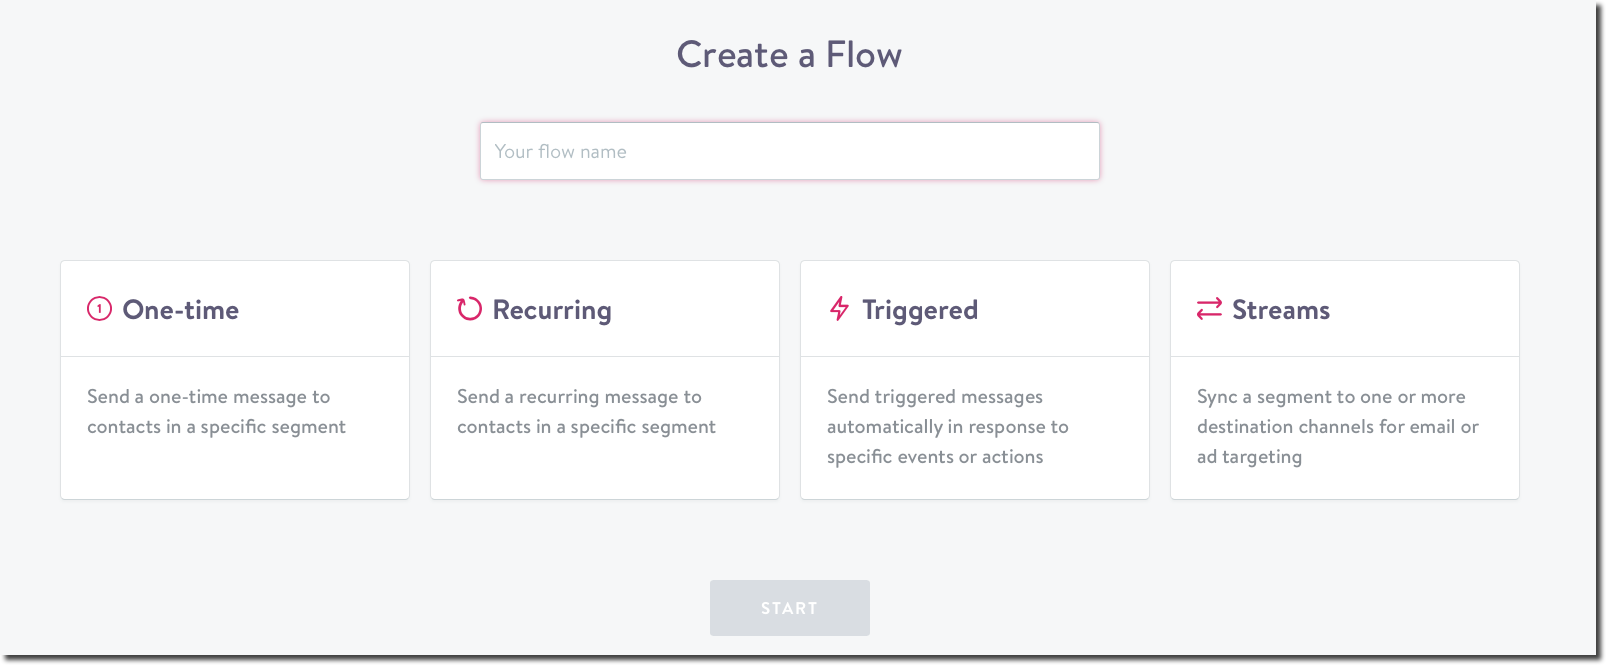
- Choose One-time, then Name your flow.
- Click Start. This flow screen displays:
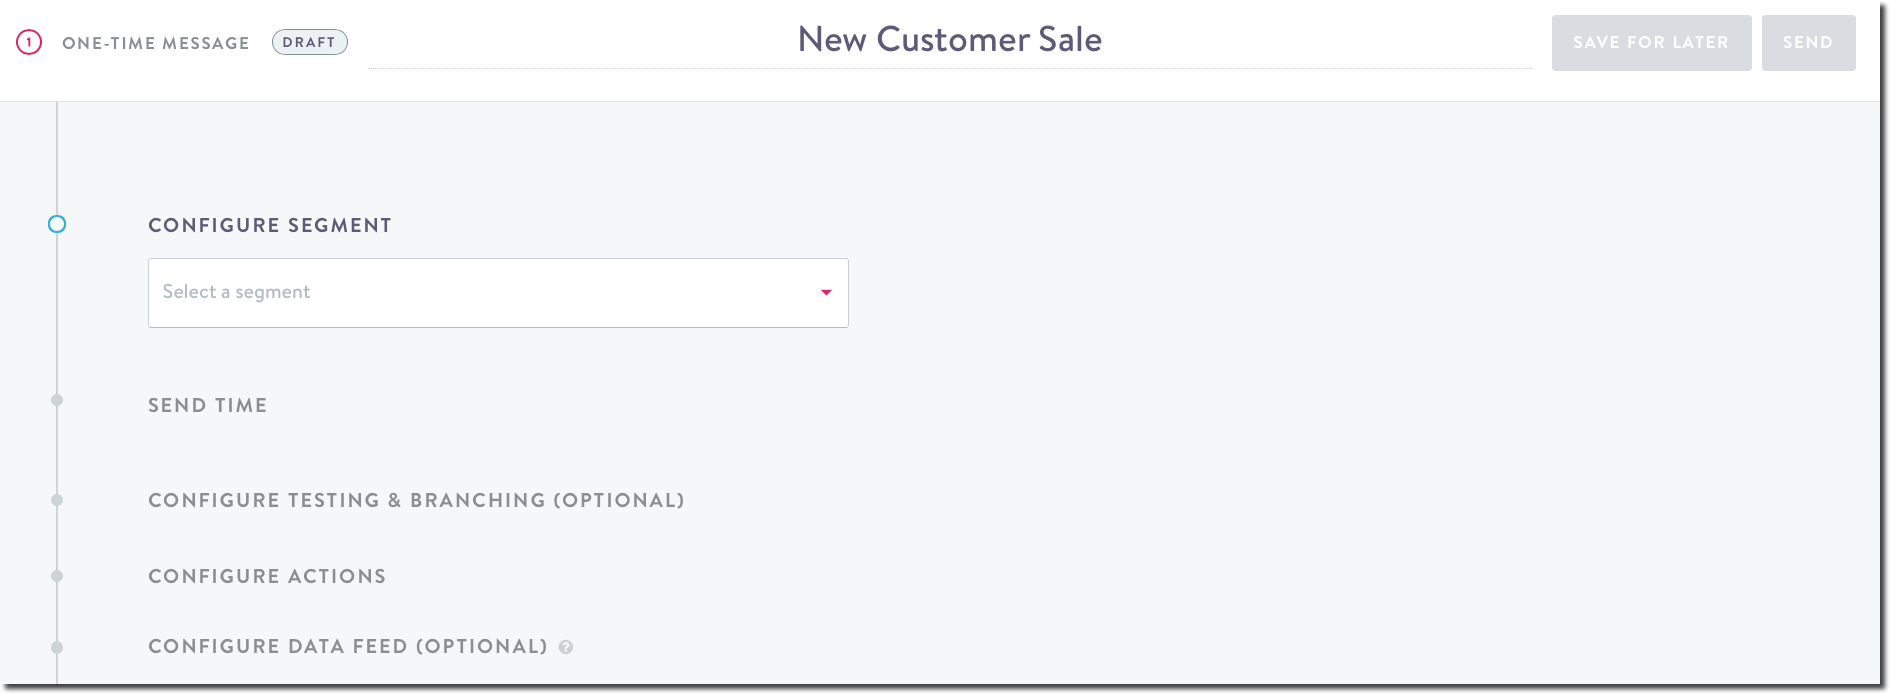
As you complete each step, the next will become available. For example, after you complete Configure Segment, Send Time will come available.
Configure Segment
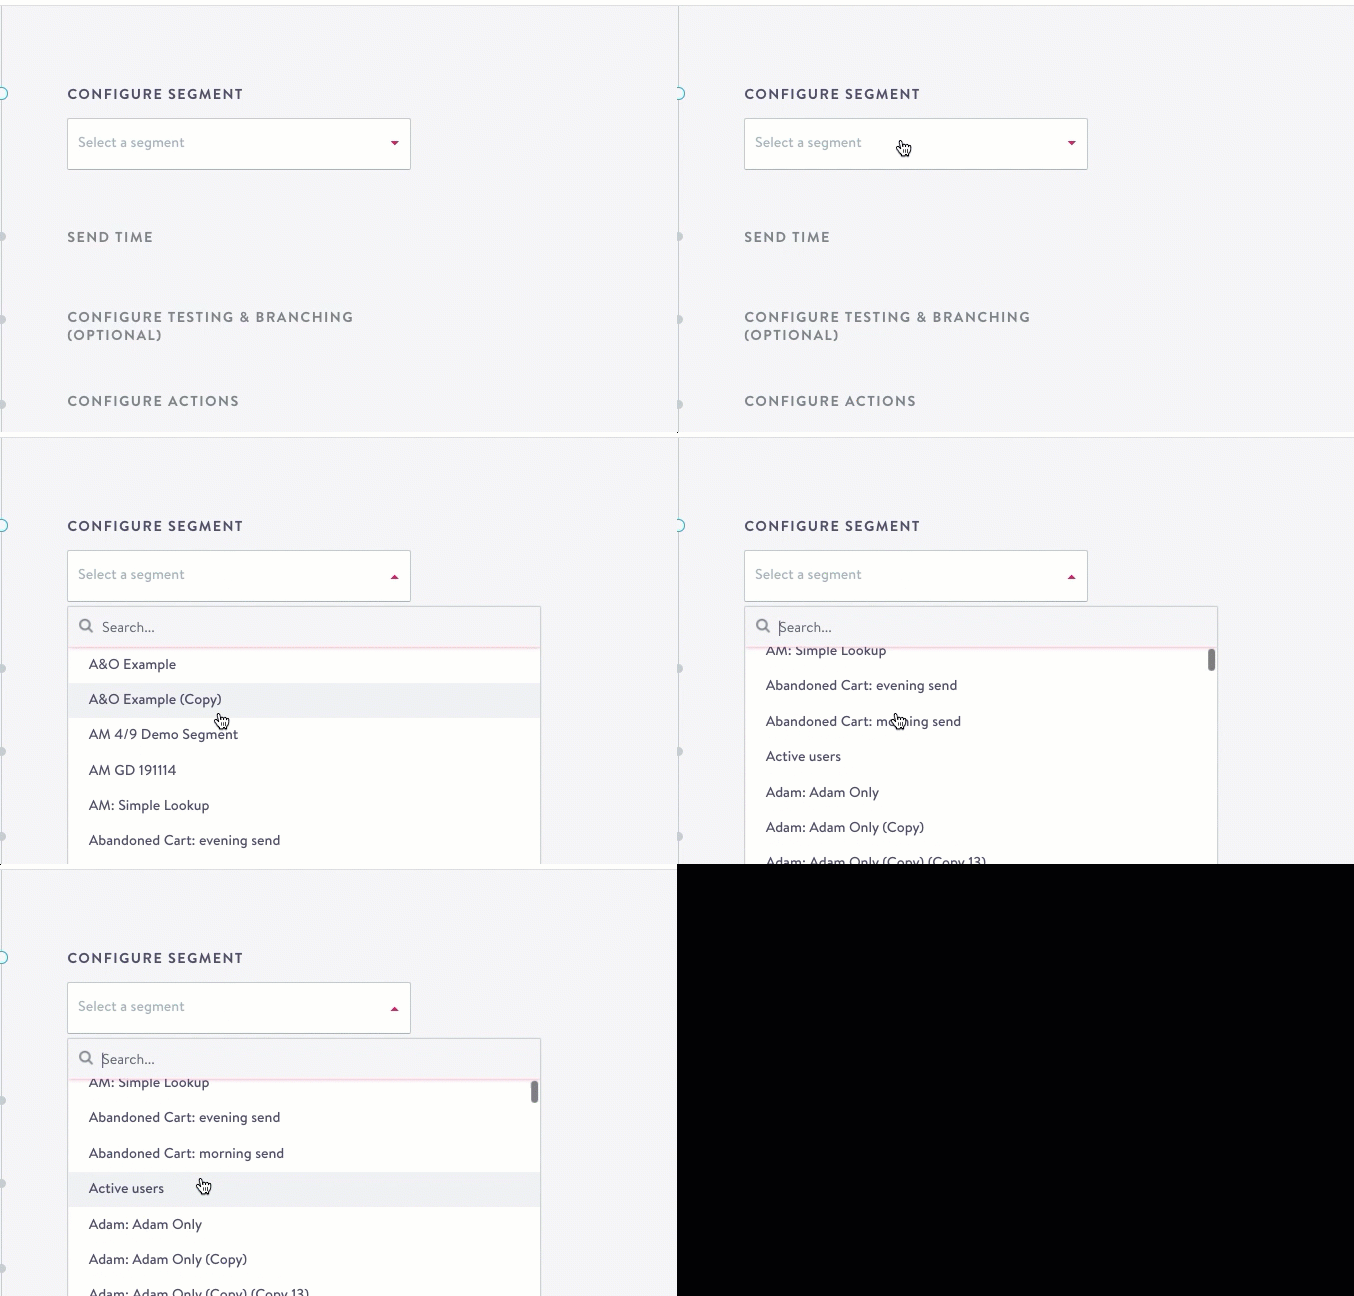
- Click the drop down then search for the segment you're targeting this message to. Click the name to complete the field:
- If you're creating a triggered message, and you'd like to send a one-time message to any contacts currently in the segment too, select that here.
Send Time
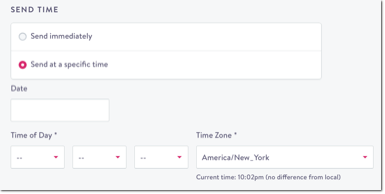
- Choose when you would like the flow action to be taken, either Immediately or Send at a specific time (complete your desired Date, Time Of Day, and Time Zone). The current time in your selected time zone displays below the field; the difference is based on your personal time zone as it's set by your admin.
Time Options Based on Flow Type
- One-time messages: send immediately or schedule sends
- Triggered and Recurring messages: select a time for the message to be sent each day Streams sync when your data is refreshed.
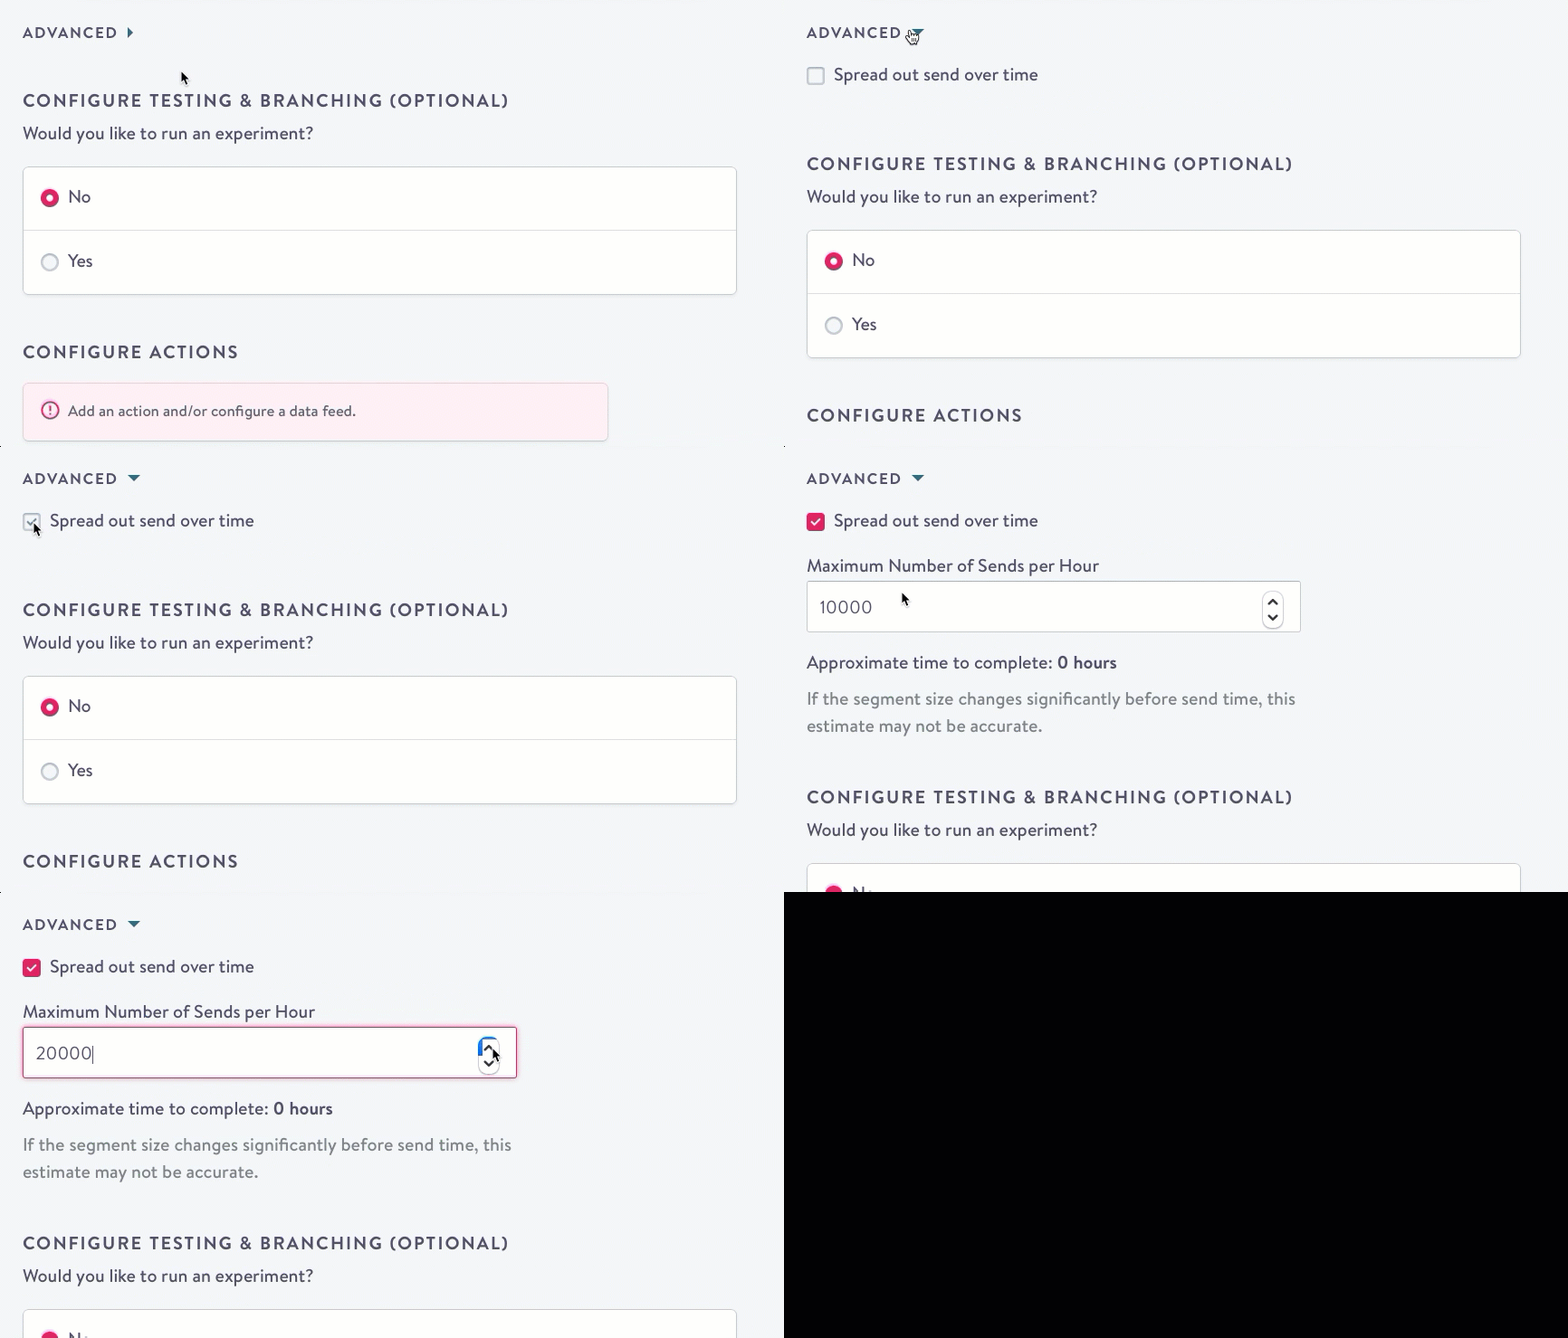
- To set a maximum number of sends per hour, expand Advanced:
- Check Spread out send over time
- Click the arrows to increase or decrease how many sends per hour. As you change the number of sends, a time estimate to complete this flow displays.
Configure Testing and Branching (Optional)
- If you don't want to run an experiment for this flow, click No and move on to step 10.
- If you do want to run an experiment, click Yes. This screen displays:
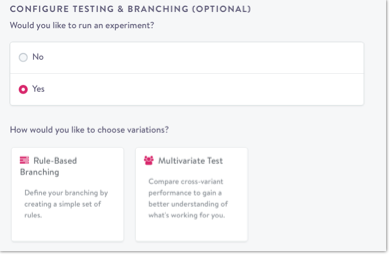
For more information on how design and run an experiment, click here.
Configure Actions
- Click the + to choose an action to take on your flow. If you change your mind, click Delete to remove it. You must choose at least one action. See Flow Action Types for a detailed breakdown of each option.
- Click OK.
Configure Data Feed (Optional)
- Optionally, click Yes to configure a data feed to export data to an Amazon S3 bucket or SFTP (Secure File Transfer Protocol) endpoint. If you don't want to configure a data feed, move on to step 14.
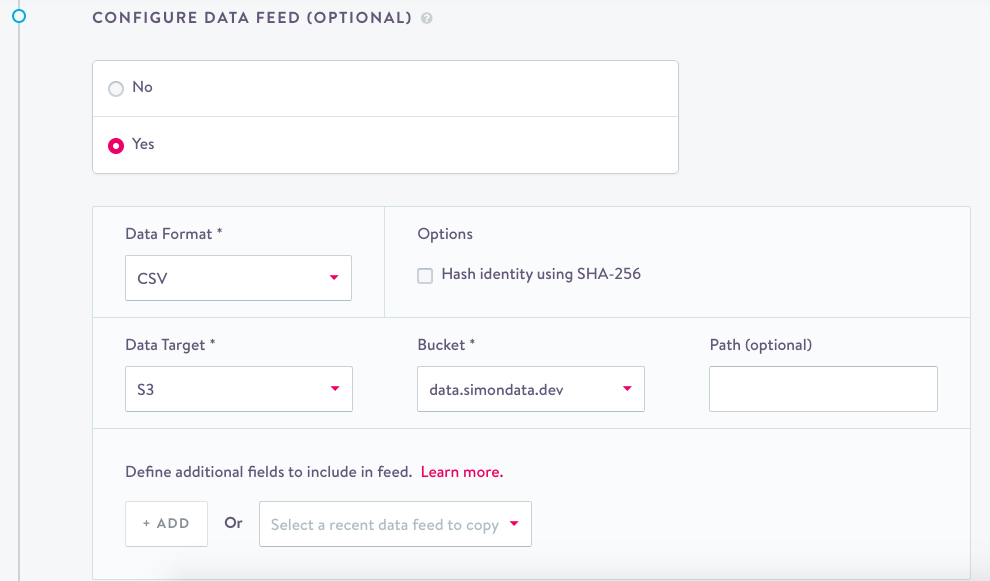
- If yes,
- Choose a Data Format (CSV, TSV, or JSONL).
- Optionally, click the checkbox for Hash identity using SHA-256.
- Choose a Data Target (S3 or SFTP).
- For S3, choose an existing Bucket to export data to.
- For SFTP, choose an existing Host.
- Optionally, include a Path.
- Define any additional fields to include in the export. You can choose to:
- Search and include an existing data feed or
- Add fields individually by clicking Add then typing a Name and Value. Click the bell icon to turn off empty custom context alerting .
- If you're not ready to send, click Save for Later
- If you're ready to send the message as you've configured, click Send.
Spread out one time sends with a throttled send
Simon provides an option to spread out the send of one-time messages to avoid extreme peaks in traffic to websites, call centers, and apps.
Throttling is configured under Send time in the flow builder. It is available for both immediate and scheduled sends. The rate is configured as a maximum number of sends per hour. When you set the send rate, you will see the approximate minimum time it would take to complete the send based on the current segment membership and the send rate. The maximum time that is allowed is 24 hours. Keep in mind that if the segment size changes substantially before the flow is launched, the actual duration may vary from the estimate provided.
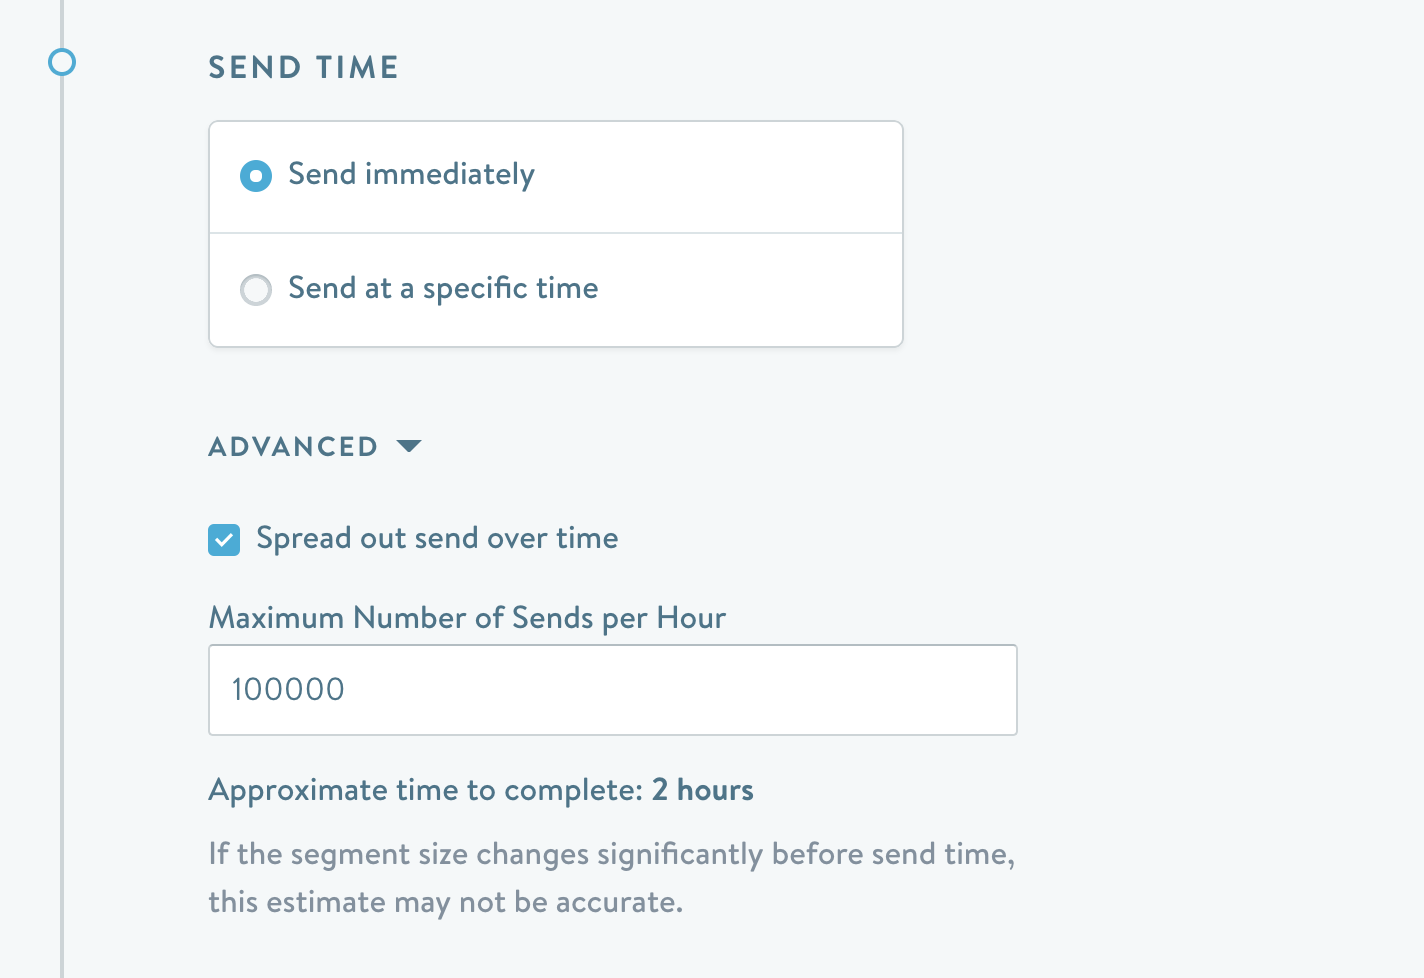
After you launch a throttled send, the maximum hourly rate will be displayed along with the flow status. A throttled sends will show up as 'Syncing' for the entire duration from when the send starts until it has completed.

Example

Example
Auto-Archival
One time sends are auto-archived after 90 days. Additional reporting is located in Campaign Metrics.
Cancel a one time send
One-time messages can be cancelled at different stages.
Scheduled send
Cancelling a scheduled send will return it to draft mode. It is the same as any other draft flow, so you can make any edits and schedule it again.
Cancelling when messages are queued in channelFor certain channels (including SendGrid), scheduled sends will get queued in channel to optimize delivery performance. You will not be able to cancel a send within Simon once the messages have been queued in the channel. If the flow has started syncing, cancelling will prevent any further messages from being queued in the channel. For more information on sync statuses, see Sync Status
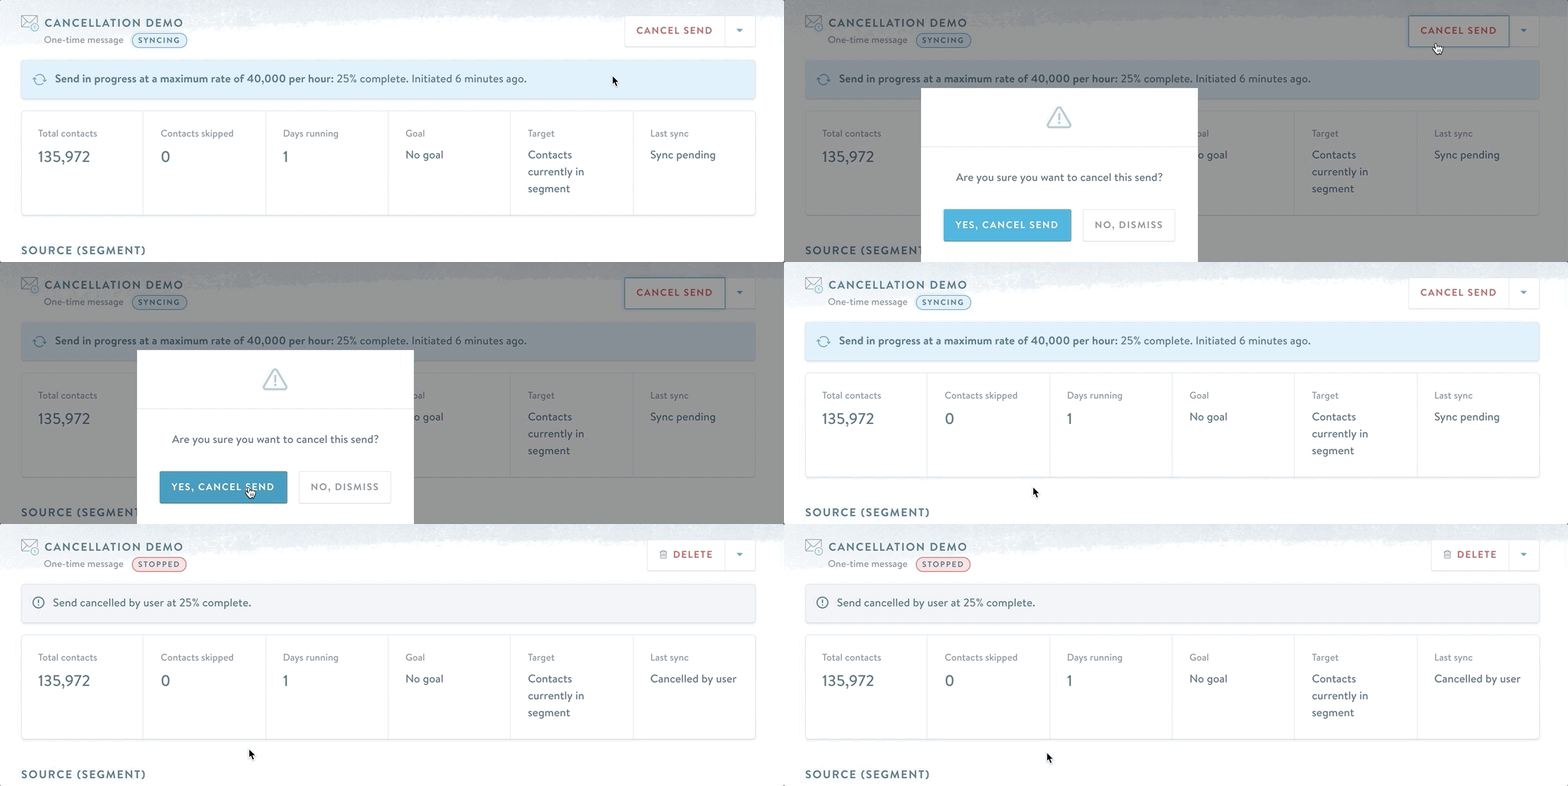
Send in progress
A one-time send can also be cancelled after it started syncing. This will prevent any additional messages from being sent to the channel, and you will be able to see what portion of your send went out.
Updated 3 months ago
