
1. Connect to Snowflake
Overview
To begin using Connected Deployment directly in Simon, you have to connect to Snowflake and allow us access in a few places.
Use this guide to create the roles and identities in Snowflake, then enter the relevant information into Simon.
1. Allowlist IPs
For us to access this service, allow Simon Data's public IP addresses in any firewalls or systems that may block our access. See the full list at Simon Data Public IP Addresses.
US East
18.211.16.116
35.173.87.106
52.7.12.28
54.152.155.89
54.165.60.44
54.165.74.55
54.174.71.70
EU West
34.253.138.241
54.76.115.255
54.77.27.229
54.228.48.108
The following IPs are for Support, which are necessary to allow our team access during onboarding or troubleshooting. Please also allow these IPs:
3.225.71.141
52.73.226.161
Create and identify roles, warehouses, and schemas in Snowflake
Before you begin:
Use a role with the permissions to create roles, users, databases, schemas and secure shares, and that has access to all necessary input data to complete the following steps.
For each of the actions below, you can also reference Snowflake's SQL Command Reference here, specifically:
2. Create a Role and User for Simondata
SimondataConnected Deployment will connect to your Snowflake instance using this user's credentials.
- Simon's operations will are limited by the privileges granted to the Role defined here.
- Simon requires one schema to read from and one schema within which to create views.
USE ROLE SECURITYADMIN;
CREATE ROLE SIMONDATA;
CREATE USER SIMONDATA PASSWORD = <secure password>;
GRANT ROLE SIMONDATA TO USER SIMONDATA;
Note the username and password, you'll need them again soon.
3. Create or Identify a Warehouse for Simondata
SimondataUSE ROLE SYSADMIN;
CREATE WAREHOUSE SIMONDATA WAREHOUSE_SIZE = <SIZE>;
GRANT USAGE ON WAREHOUSE SIMONDATA TO ROLE SIMONDATA;4. Create Database
Simon’s Connected deployment operates on a database within your Snowflake instance. Our application creates various schemas within this database to organize the objects it produces. The schemas that are created and the data within them will vary depending on the parts of the application you use.
Create a dedicated database for Simon’s operations
CREATE DATABASE SIMONDATA;
USE DATABASE SIMONDATA;
GRANT OWNERSHIP ON DATABASE SIMONDATA TO ROLE SIMONDATA;
USE ROLE SIMONDATA;
CREATE SCHEMA <input schema name>;
USE ROLE SYSADMIN;
GRANT SELECT ON FUTURE VIEWS IN SCHEMA <input schema name> TO ROLE SIMONDATA;
5. Grant Access to Input Data
For each existing table or view in your Snowflake instance to which you want to grant Simon access, run the following:
Note: The ALTER TABLE statements below are necessary because some Simon features use Streams under the hood to track table changes. Change tracking must be enabled on the relevant objects to support Streams
CREATE SECURE VIEW <database name>.<input schema name>.<view name> AS SELECT \* FROM <path to raw table or view>
ALTER TABLE <path to raw table or view> SET CHANGE_TRACKING = TRUE;
ALTER TABLE <database name>.<input schema name>.<view name> SET CHANGE_TRACKING = TRUE;
6. Grant Permissions for Additional Snowflake Functionality
Simon leverages several additional Snowflake object types to improve the performance of our application within your data warehouse:
As we continue to invest in our Connected deployment, this list is subject to change, with additional new Snowflake functionality added.
Tasks require the following permission be granted:
GRANT EXECUTE TASK, EXECUTE MANAGED TASK ON ACCOUNT TO ROLE SIMONDATA;7. Authenticate in Simon
- Log in to Simon.
- From the left navigation, expand Admin Center, then click Integrations.
- Scroll to Snowflake then click Edit.
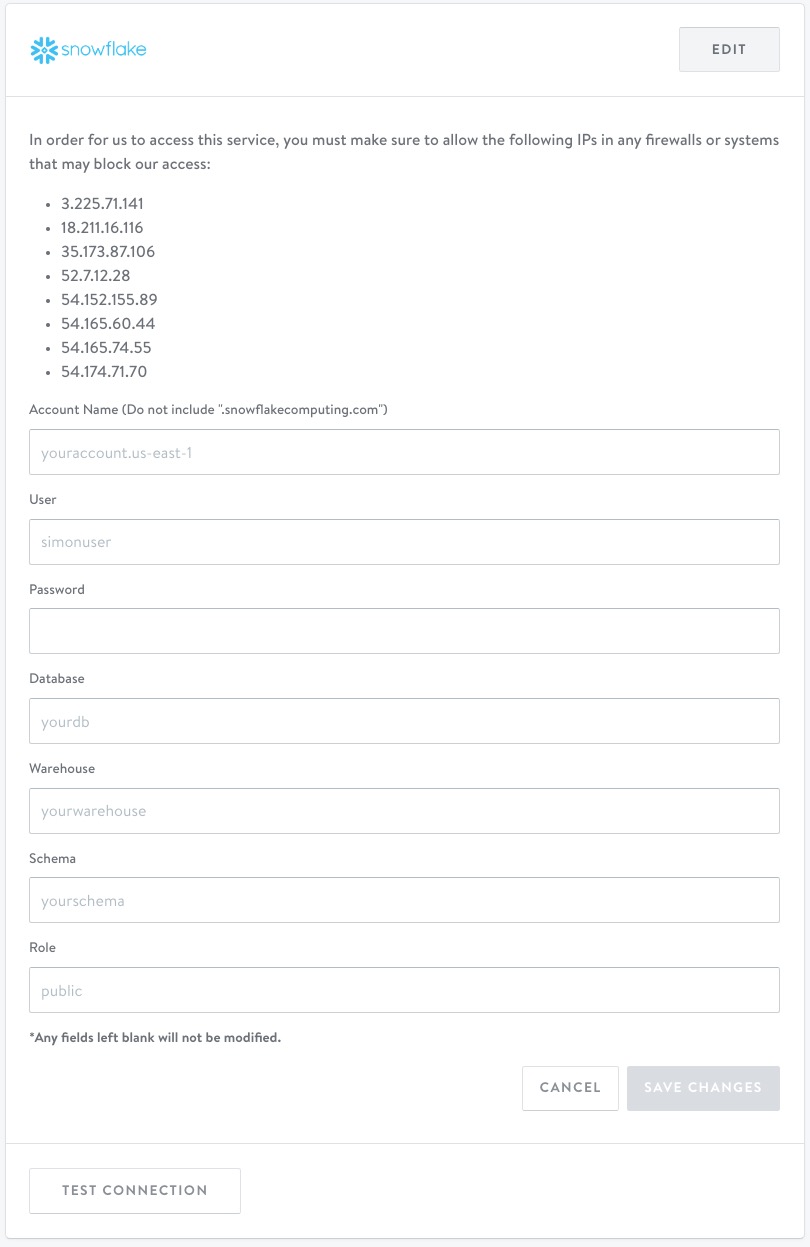
Complete the fields described below
| Field | Description |
|---|---|
| Account Name | The identifier for your Snowflake account. This appears in the URL you use to access Snowflake: e.g. if the URL is <https://ab12345.us-east-1.snowflakecomputing.com> the Snowflake account is ab12345.us-east-1. |
| User | The name of the user created in step 2 (this is SIMONDATA if you matched the step exactly, but you can choose something else). |
| Password | The password for the user created in step 2. |
| Database | This is the name of the Database created for us in step 4. |
| Warehouse | This is the name of the Warehouse created for us in step 3. |
| Schema | This is the name of the input Schema created for us in step 4. |
| Role | The role created in step 2 (this is SIMONDATA if you matched the step exactly, but you can choose something else). |
- Click Save Changes. Successful connections will display Connected next to edit.
Let us know you've connected
Once you complete the steps above, let us know you're connected. We have to make some manual adjustments on our side using the table names, etc. that you shared in step 1 then we'll let you know when you can move on to step 3 and configure your tables in Simon's Schema Builder.
Updated about 2 months ago