Simon Journeys Overview
Overview
Journeys Classic allows users to construct and visualize a multi-step, cross-channel marketing program that takes advantage of the power and flexibility of the Simon platform. A journey starts with a trigger and proceeds with a series of flows where contacts can be routed based on their attributes and actions. This gives users a high degree of flexibility in creating messages and personalizing cross-channel experiences.
Navigate to Journeys Classic
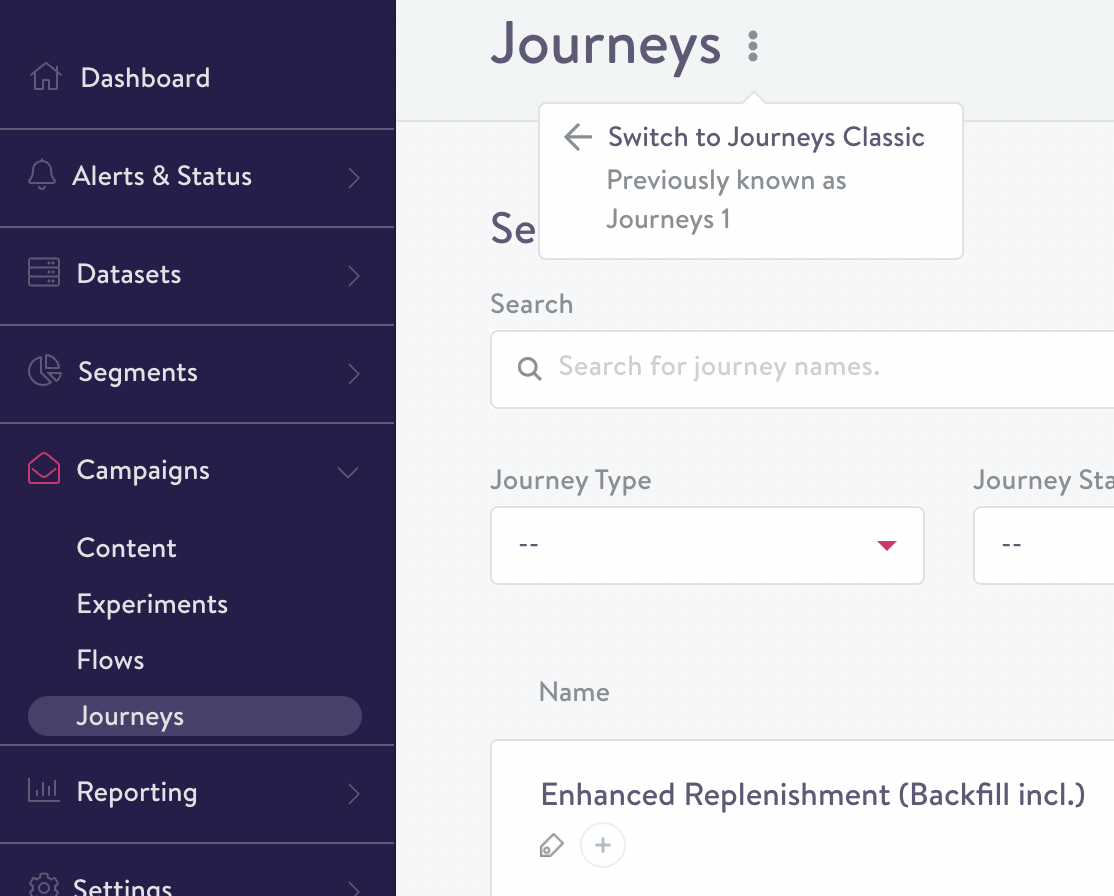
From the Journeys Dashboard, hover over the ellipsis then click Switch to Journeys Classic:
Set up a journey
In Journeys Classic, a contact enters the first flow upon a triggering event. A trigger could be an observed event (e.g., abandoned cart, website registration) or a determined lifecycle event (e.g., becoming a lapsed user, accumulating more than $1,000 of lifetime spend).
Setting up a journey begins by naming a journey and selecting the first flow in the sequence.
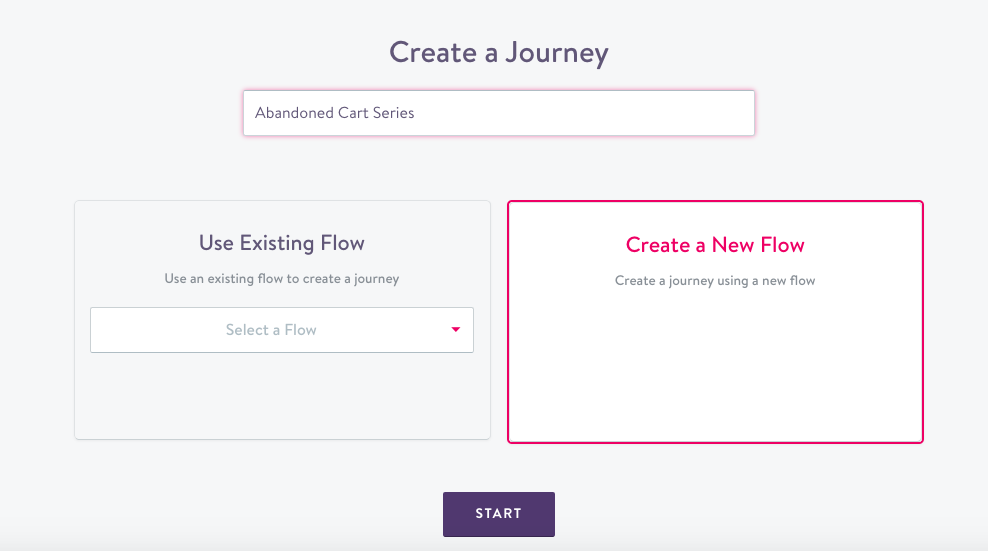
Select an existing triggered flow or create a new flow when starting a journey.
Create a new flow
The trigger is selected as part of the flow setup. In the below example, the journey starts with an event trigger, specifically an abandoned cart event.
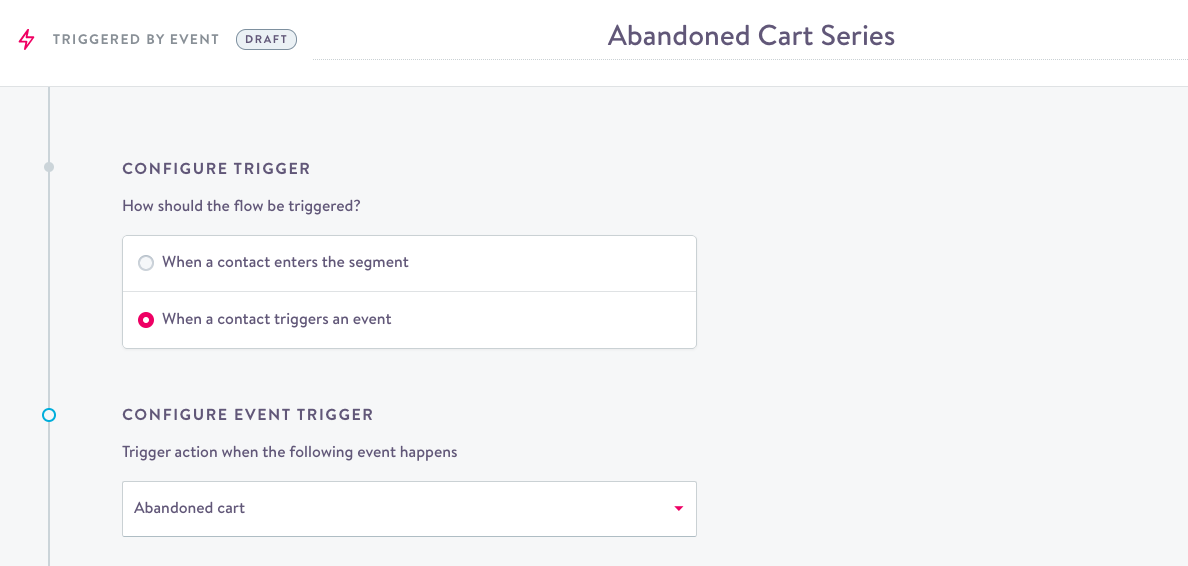
Selecting the trigger for the first flow in a journey.
Each flow will need at least one channel action. You can learn more about general flow set up in Campaigns - flows ). Journeys can also take advantage of Experiments and Rule-based Branching in order to provide a different experience to different contacts (more details, below).
Each action in a journey can be configured with its own set of personalizations based on the information in the contact profile, the triggering event, and lookup tables.
After saving the first flow of a journey, the system will start to build a visual representation of the journey, including the original triggering event.
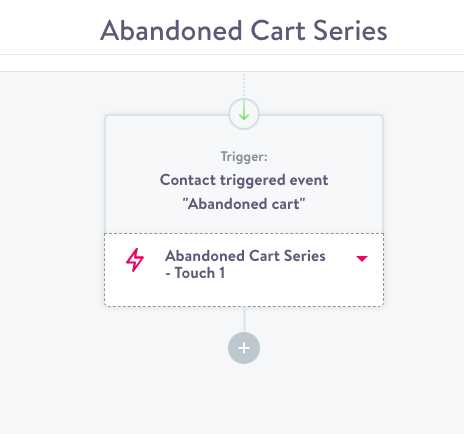
The first step of an abandoned cart journey.
Additional flows can be added to a journey by clicking the + button.
Actions
Journeys supports a variety of actions and triggered messaging channels, including but not limited to:
- Push and in-app messages
- SMS message
- Send postcard
- Webhook
Add follow-up flows
A multi-step journey is based on one or more follow-up flows. Contacts who pass through the original flow automatically enter the subsequent flow. Follow-up flows will have a delay from the previous flow, which is configurable in the flow set-up.
How to name your flows
We recommend that each flow in a journey should have a different name for ease of use in results and flow membership.
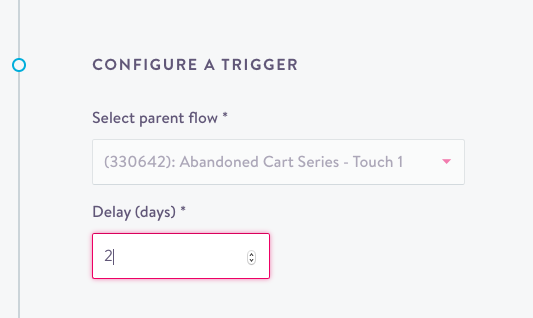
Configuration options for a follow-up flow.
Delays can be set in intervals from 1 to 365 days.
Once a follow-up flow is saved, it will show up in the journey visualization.
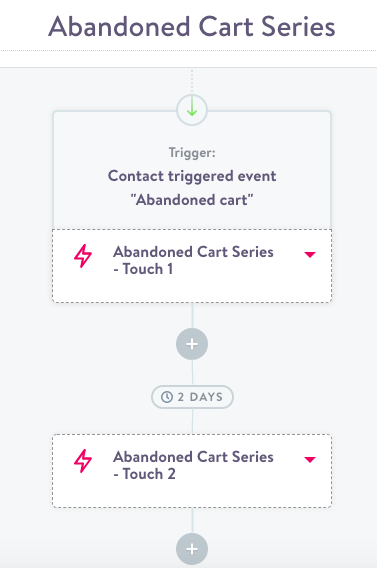
An abandoned cart journey with two steps.
Segment filtering in journeys
Segment membership filters allow a user to suppress certain contacts from a flow. For example, a user can prevent contacts that have completed a purchase after abandoning their cart from entering the second flow of an abandoned cart series. Segment filters can take advantage of any data in Simon to suppress contacts from the rest of the journey.
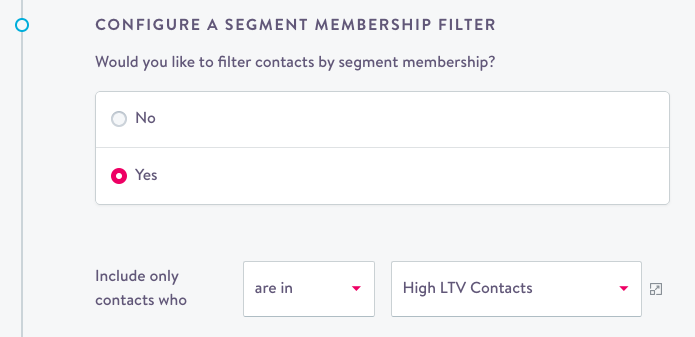
Suppressing members of a segment from a follow-up flow.
Set up branching and experiments
There are several ways that you can route contacts to different experiences within a journey:
- Rule-based branching lets you define the parameters directly.
- Experiments let you compare the efficacy of different variants.
Branch based on rules
Rule-based Branching provides a powerful way to design personalized experiences for contacts based on the accumulated knowledge about that individual contact. It utilizes a rule-based approach for determining the experience that a contact should receive, and automatically ensures contacts will not be included in more than one path of a journey.
Branching can be based on segment membership, event properties, or branch membership from a previous step in the journey. As an example, branching based on segment membership can be used to:
- Provide a different message to high LTV contacts.
- Account for product category purchase patterns.
- Provide geographic differentiation.
An an example, branching based on event properties can be used to differentiate between:
- Different sign-up sources or geographic location for registration events.
- The category of products in a cart.
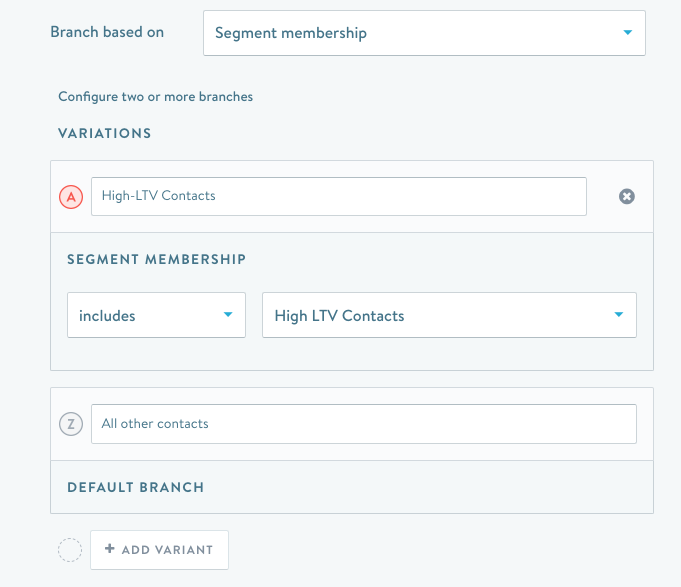
Setting up a flow to provide a different experience for high-LTV contacts.
Each branch can be configured with its own set of channel actions. This means that a branch can not only leverage different email templates, but can also send a message to contacts using different channels. Branches can be maintained in subsequent flows or merged into a common experience downstream.
Providing a different experience based on branching in an upstream flow does not require setting up multiple flows. This reduces clutter and makes it easier to compare the performance of different branches. Rules-based branching also can be used to create a hierarchy of messages, where the first set of conditions that a contact meets will determine the message to be sent.
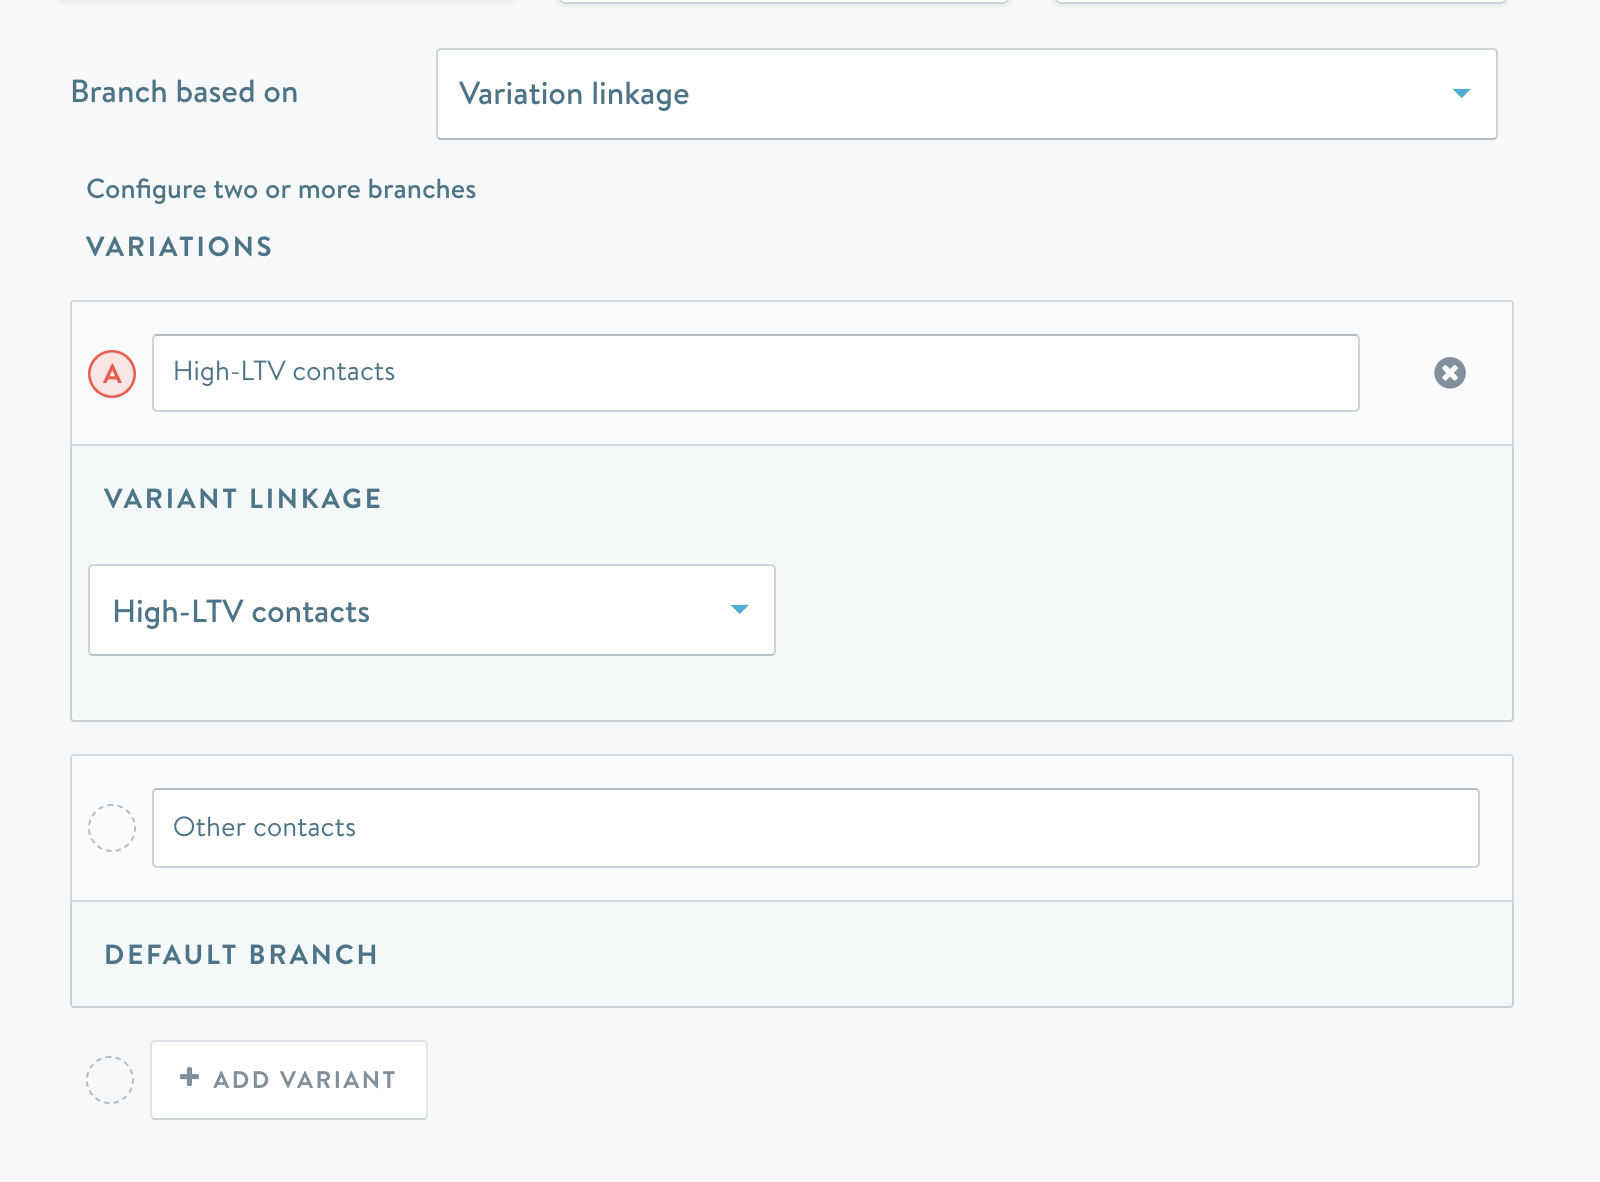
Using previous variant received as a criteria for branching in follow-up flows.
Downstream effects of branching and experiments
After you set up branching or an experiment, there are a few different options for downstream flows.
- No continuation of the variants: all contacts receive the same variant downstream or a new branching / experiment configuration is set up.
- Continue branching / experiment from parent flow: contacts will continue within the same branch or experiment (this is the default value).
- Create separate flows by variant: a new flow can be created downstream of each variant (see the screenshot further below for an example).
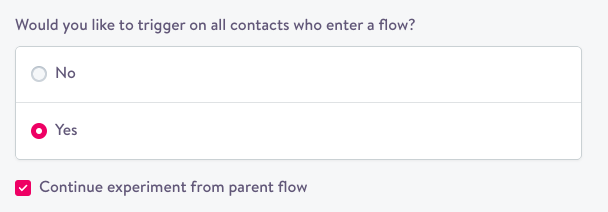
'Continue branching / experiment from parent flow' will keep contacts within the variants from the preceding flow.
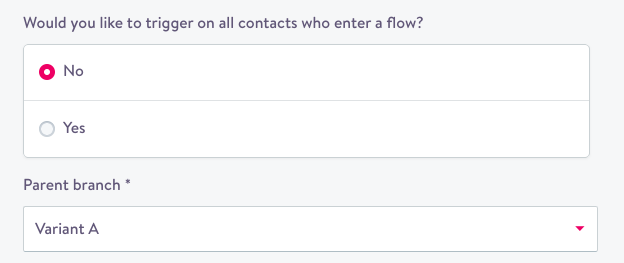
A flow can be limited to the contacts in single variant in the preceding flow.
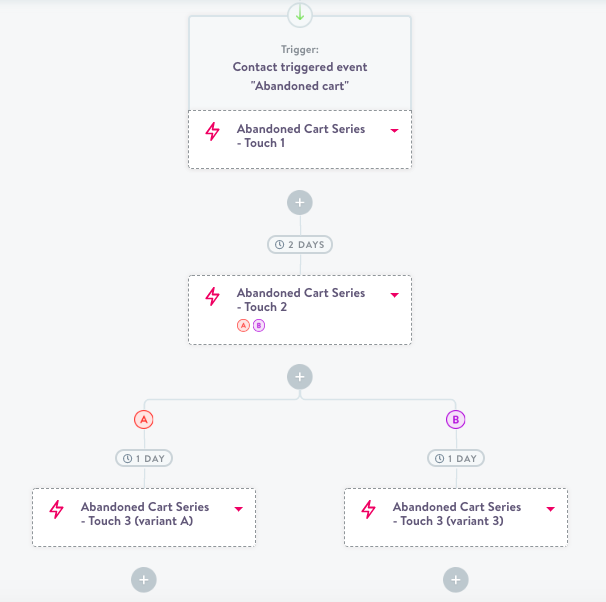
Abandoned cart journey visualization.
Stop a journey
There are two options for stopping a journey.
- Stop will shut down the journey and all contacts in the journey will stop receiving messages (sends that are happening right then will still complete, however).
- Drain will prevent new contacts from entering the journey, but contacts who are already in the journey will continue to flow through it until they exit. When all contacts have exited the journey, it will automatically be stopped.
Copy a journey
A journey can be copied in much the same way as a flow. The new journey will include a copy of all the flows that make up the original journey.
Copying data feeds along with a journey
If you have configured data feeds within the flows that make up the journey, you will have the option to copy those, too. When doing so, you can specify a destination and path for the new journey. User can specify the file path for the new journey data feed. The path can either be the same for all flows, or include the flow id to break out the reporting by flow. You can also choose to append the journey id to the file path. All fields and the file format settings will automatically be copied from what is already defined in each individual flow that is copied.
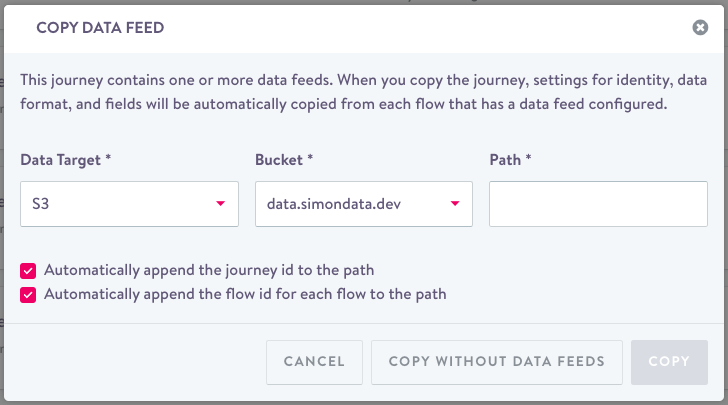
You will find specific options around data feeds when copying a journey.
Updated about 1 year ago
