Manage Subscription Lists
Add or Remove Contacts from Simon Mail Subscription Lists.
Understand Subscription ManagementBefore you create or manage lists, be sure to read Subscription Management first, to learn how unsubscribes, default lists, and category lists work.
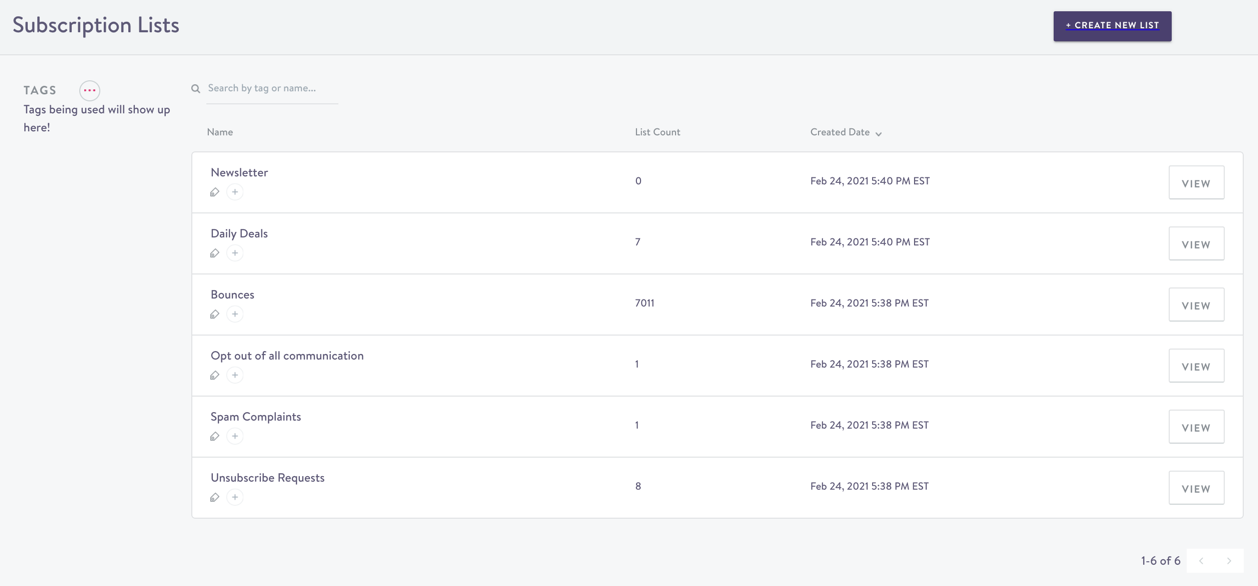
Subscription Lists Dashboard
- From the left navigation, expand Segments.
- Click Subscription Lists.
Default lists are Bounces, Opt out of all communication, Spam Complaints, and Unsubscribe Requests.

Subscription Lists Dashboard
From the list view, you can see the list Name, the number of contacts currently in the list (List Count), and the date the list was created (Created Date). Lists appear in order of creation.
From the dashboard, you can also add tags to organize your lists.
List View
From the List Dashboard click the list name or click View to see:
- List Created: The date this subscription list was created. (Default lists are created for you at onboarding)
- List Count: The number of contacts currently unsubscribed from this list's messages
- List description: Default Lists contain default descriptions
- Contact names, email addresses, and opt-out dates for contacts who won't receive any emails from this list
View 100 Contacts Per ListYour list displays 100 contacts. To find a specific contact not displayed, use the search box.
View Contact Details
From the View screen, click any contact name to open that Contact Profile in a separate tab.
Unsubscribe Contacts
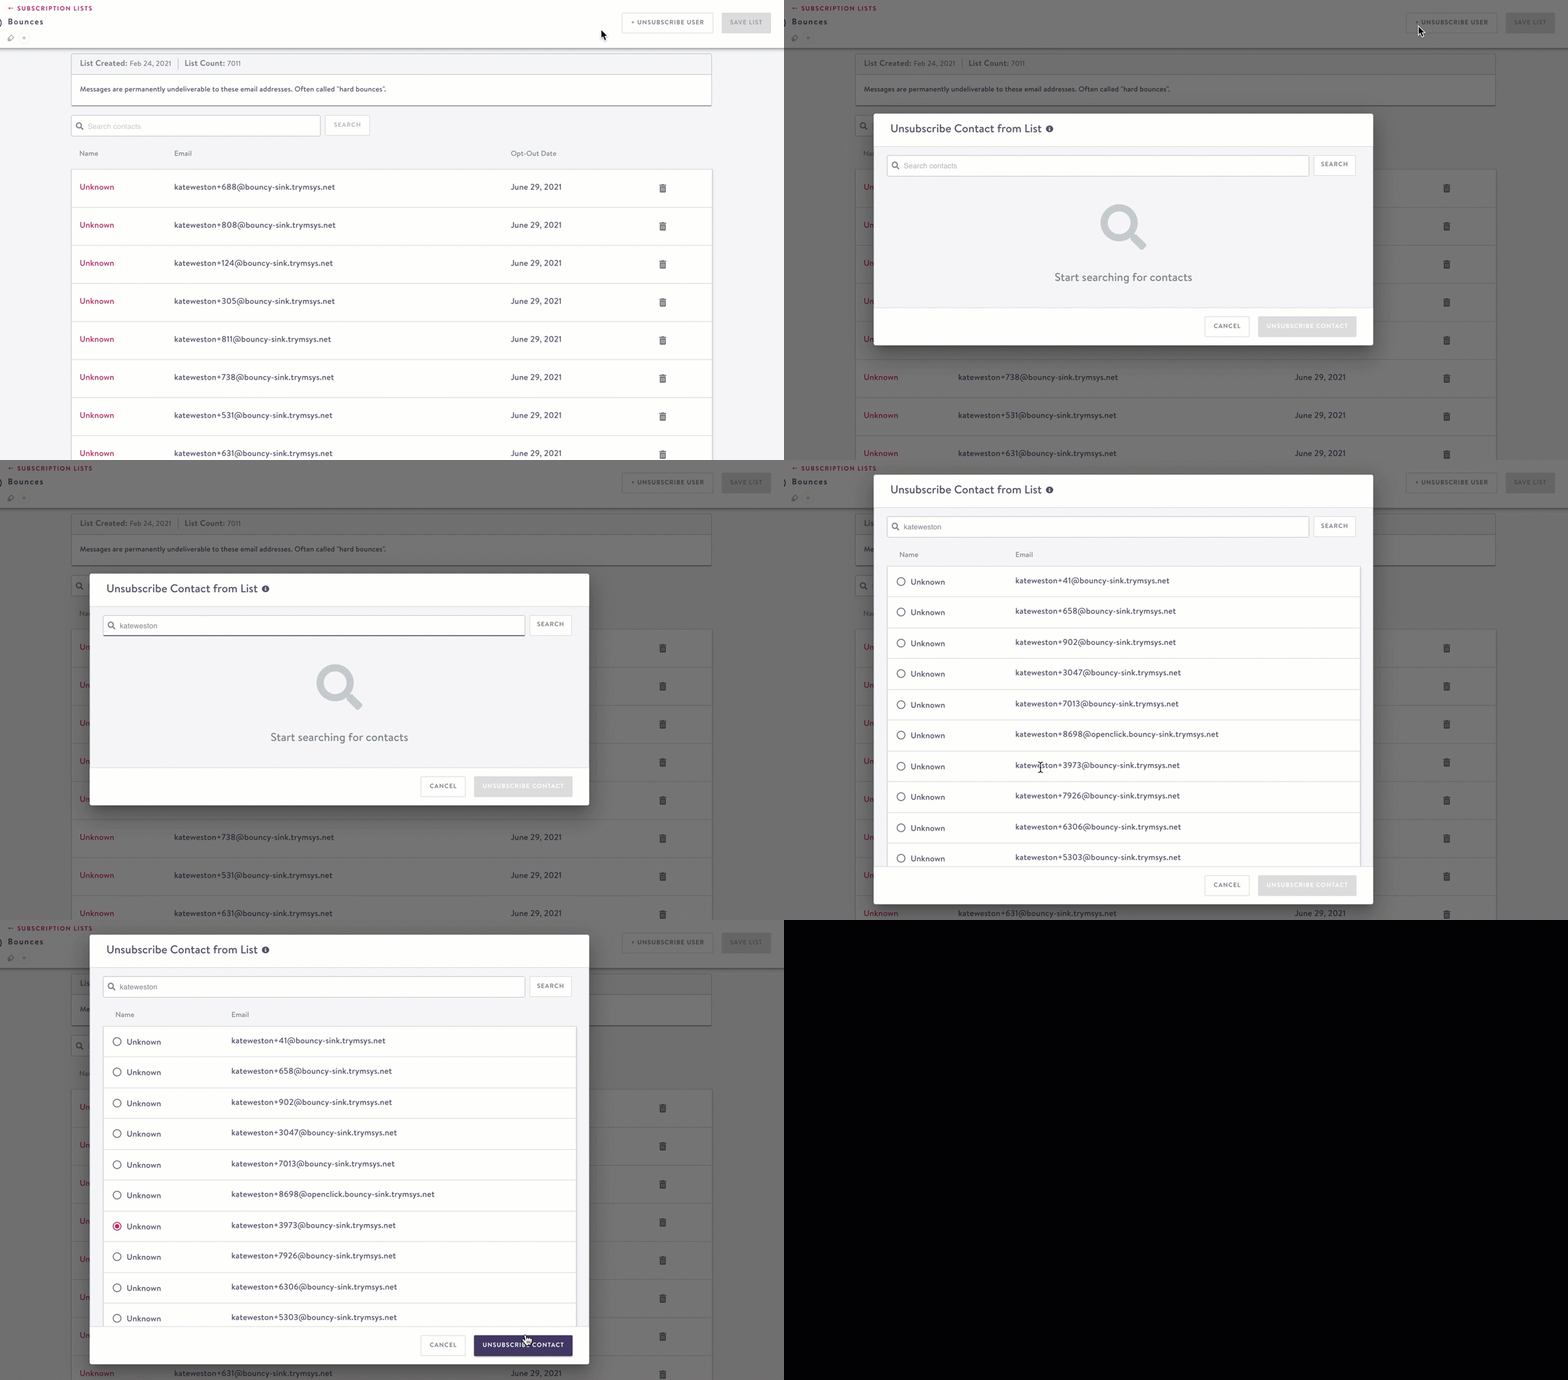
This action adds a contact to this unsubscribe list so they won't receive these message types anymore.
- From the Subscription List View, click Unsubscribe Contact
- Search for the contact you want to remove.
- Click Unsubscribe Contact. You'll see a successful message indicating your contact will no longer receive emails this list receives for any action, starting immediately. (You don't need to click Save List for the unsubscribe to happen).

Bulk UnsubscribeContact your account manager to bulk add contacts to this list.
If the customer wants to be removed from all communication, add them to the Opt Out of All Communication List.
Resubscribe Contacts
If a contact previously unsubscribed, you can resubscribe them to that message type by removing them from the respective suppression list.
- From the Subscription List View, search for the contact.
- In their contact row, click the Delete icon. Successfully resubscribed member displays. You'll no longer see this contact in the list view and they're no longer suppressed from the list; they'll receive messages from this list. (You don't need to click Save List for the resubscribe to happen).

You can resubscribe any contact in any list, even Bounces. Be careful to respect your contact's preferences when doing this.
Suppress a User From All Current and Future Messages
Rather than adding a contact to each unsubscribe list individually, you can simply add them to the Opt Out of All Communication List to prevent them from receiving any messaging. This list takes priority over all other lists. See Subscription Management: Default Lists for more details.
Edit List Name or Description
Click in the field and make your changes, then click Save List.
Delete or Archive a List
You can't currently delete or archive lists.
Updated 3 months ago
